This technique can be useful for many purposes, including:
- Develop a serious WordPress site locally, but work with all the correct URLs for the end production domain.
- Test a serious WordPress site on a development server using the correct domain settings, but without the need to resolve DNS publicly. Especially useful when redeveloping an existing live site.
- Migrating a serious WordPress site from an existing domain and hosting to a vCanopy server. Allowing you to test the migration before swapping over DNS.
And more.
You can also accomplish this with tools like https://hosts.cx/, which is also a handy website for your toolbox, but we highly recommend that you learn how to use your local hosts file for redirects.
In this article, we will use a simple example to go through the process of editing your hosts file to enable this. We’ve also made video demonstrations of how to do it as well:
Windows:
For Mac:
In our example, we have a new client who owns their domain at http://an-example.com and they currently have a coming soon holding page at their old hosting.
We are going to install a development site on a vCanopy server and edit our hosts file to redirect our browser to the vCanopy server when visiting the client domain.

In our terminal, we can confirm the IP of the server that their domain currently resolves to quite easily by using the ping command.
ping an-example.com
This command will work for macOS, Windows, and Linux machines.
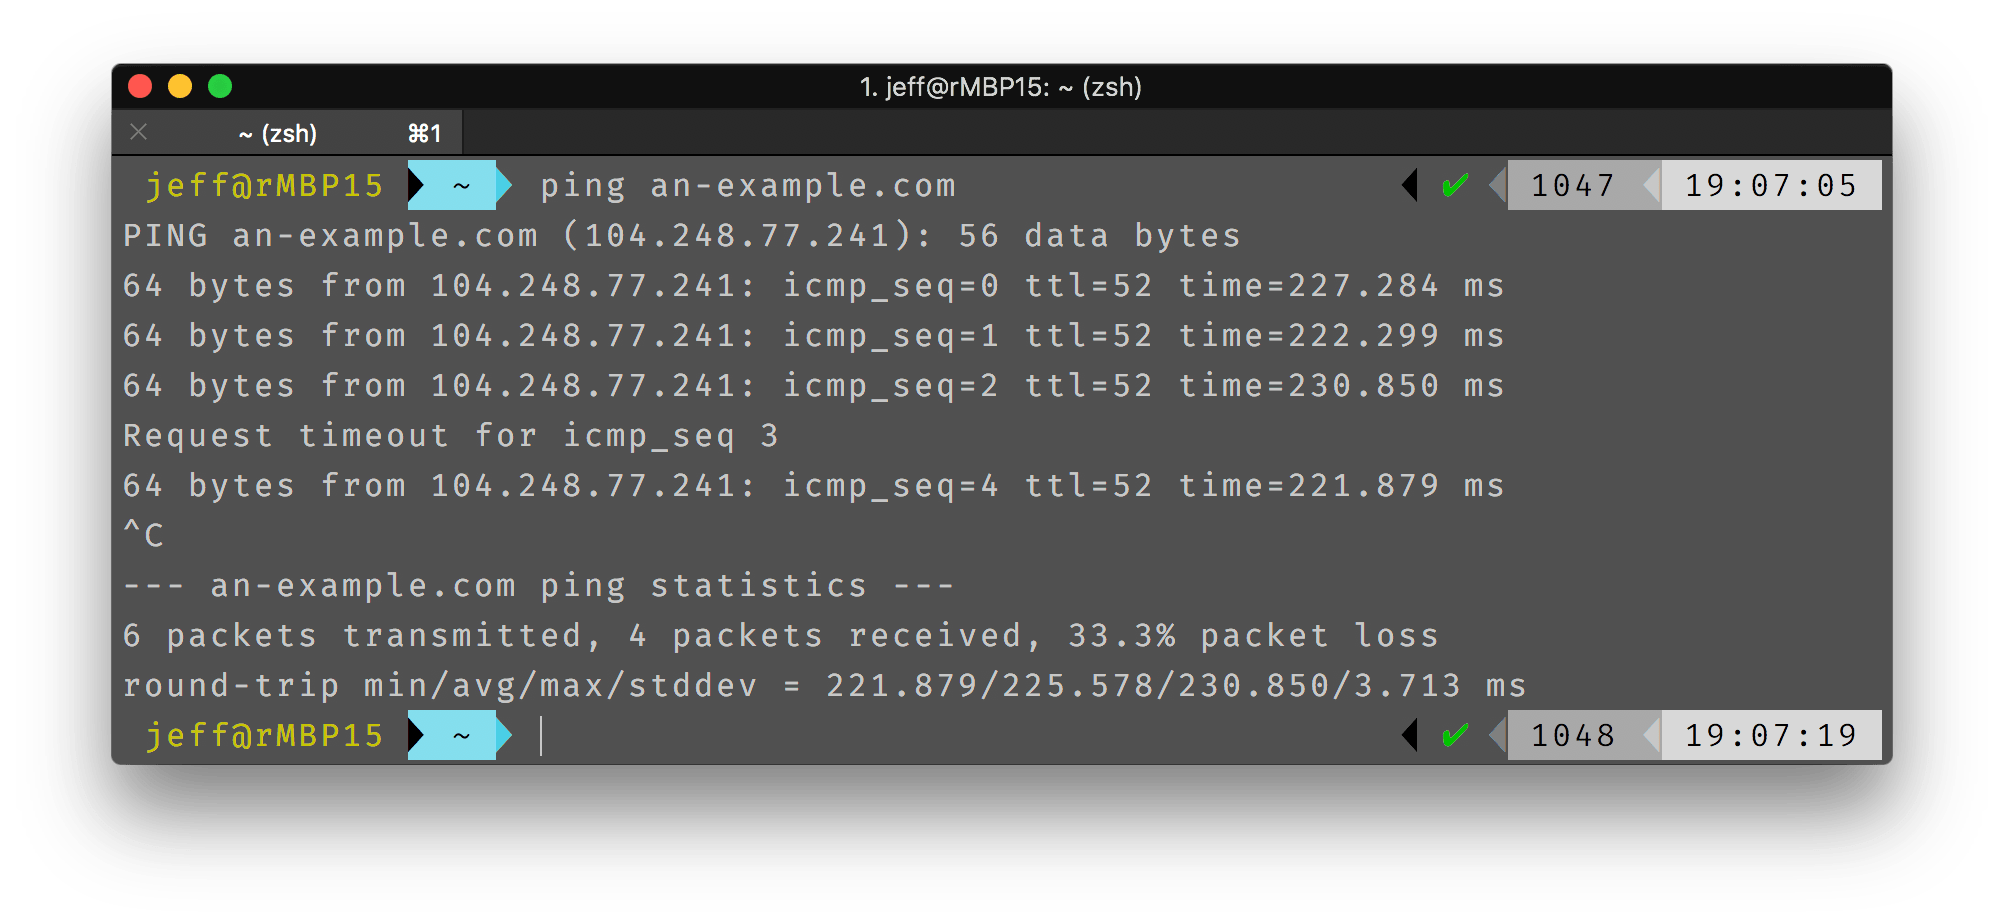
As we can see, our example clients holding page is currently being hosted on a server with the IP of 104.248.77.241.
Whenever someone on the internet visits their domain, an-example.com , their DNS records point them to this server.
Step 1. Create a vCanopy server.
In my vCanopy account, I have created a server on which I will install my development site for an-example.com , as you can see it has the IP address of 139.59.190.225.
You can do so easily by following one of our step by step guides here.

Make a note of your server’s IP address.
Step 2. Edit your Hosts file to create the URL redirect
Instructions for editing hosts file manually given below. If you prefer to use software that makes it a bit easier to do the same, you may want to use Gas Mask (for Mac) or Hosts File Editor (for Windows).
Now open your host file on your local computer for editing.
On macOS this is located at:
/private/etc/hosts
On Windows this is located at:
c:Windows/System32/Drivers/etc/hosts
On Linux this is located at:
/etc/hosts
Within your hosts file add an entry at the bottom, using the vCanopy server IP address you wish to redirect to IP and the live domain you wish to redirect away from. It is usually best to add both the root domain and the www host domain.
139.59.190.225 an-example.com
139.59.190.225 www.an-example.com
Make sure that there is only one space or tab between the IP address and the domain.
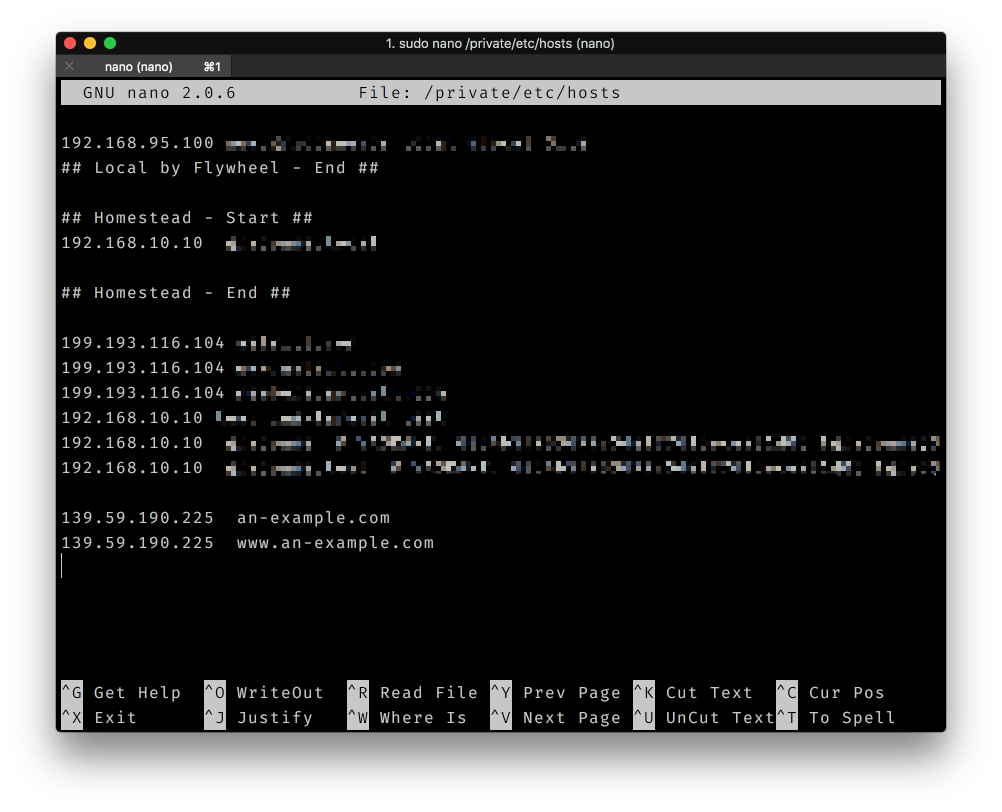
Save your file and exit.
Step 3. Test that your Hosts URL redirect is working
Prior to testing, you should clear your local machine system cache. You can follow these instructions to learn how to do that.
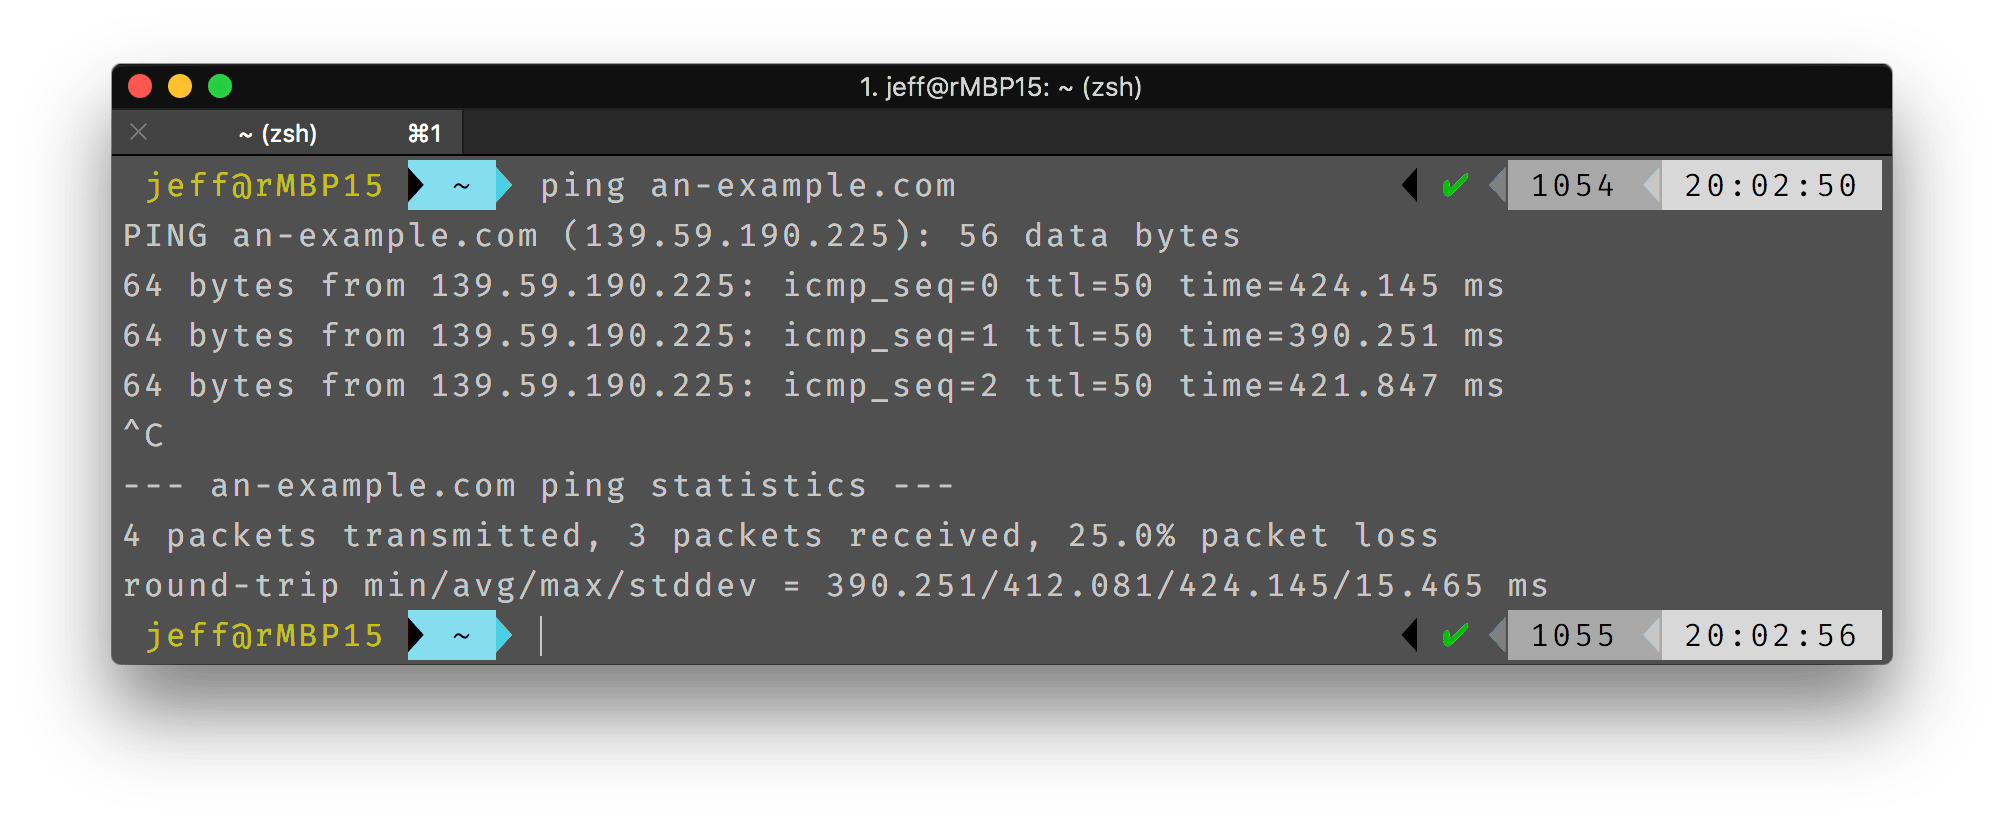
Now that your cache is cleared, you can retest using ping.
ping an-example.com
If your results show a ping to your vCanopy server then the redirect is working.
In this example, the server I want to redirect to has an IP address of 139.59.190.225. We can see from the ping results to the domain an-example.com is resolving to this IP address, this confirms the redirect is working.
Step 4. Create your development site
Now, all we have to do is to create a vCanopy WordPress site on the server we provisioned earlier. We have an easy to follow guide here to show you how to provision a vCanopy site.
Step 5. Visit your development site using the redirected URL
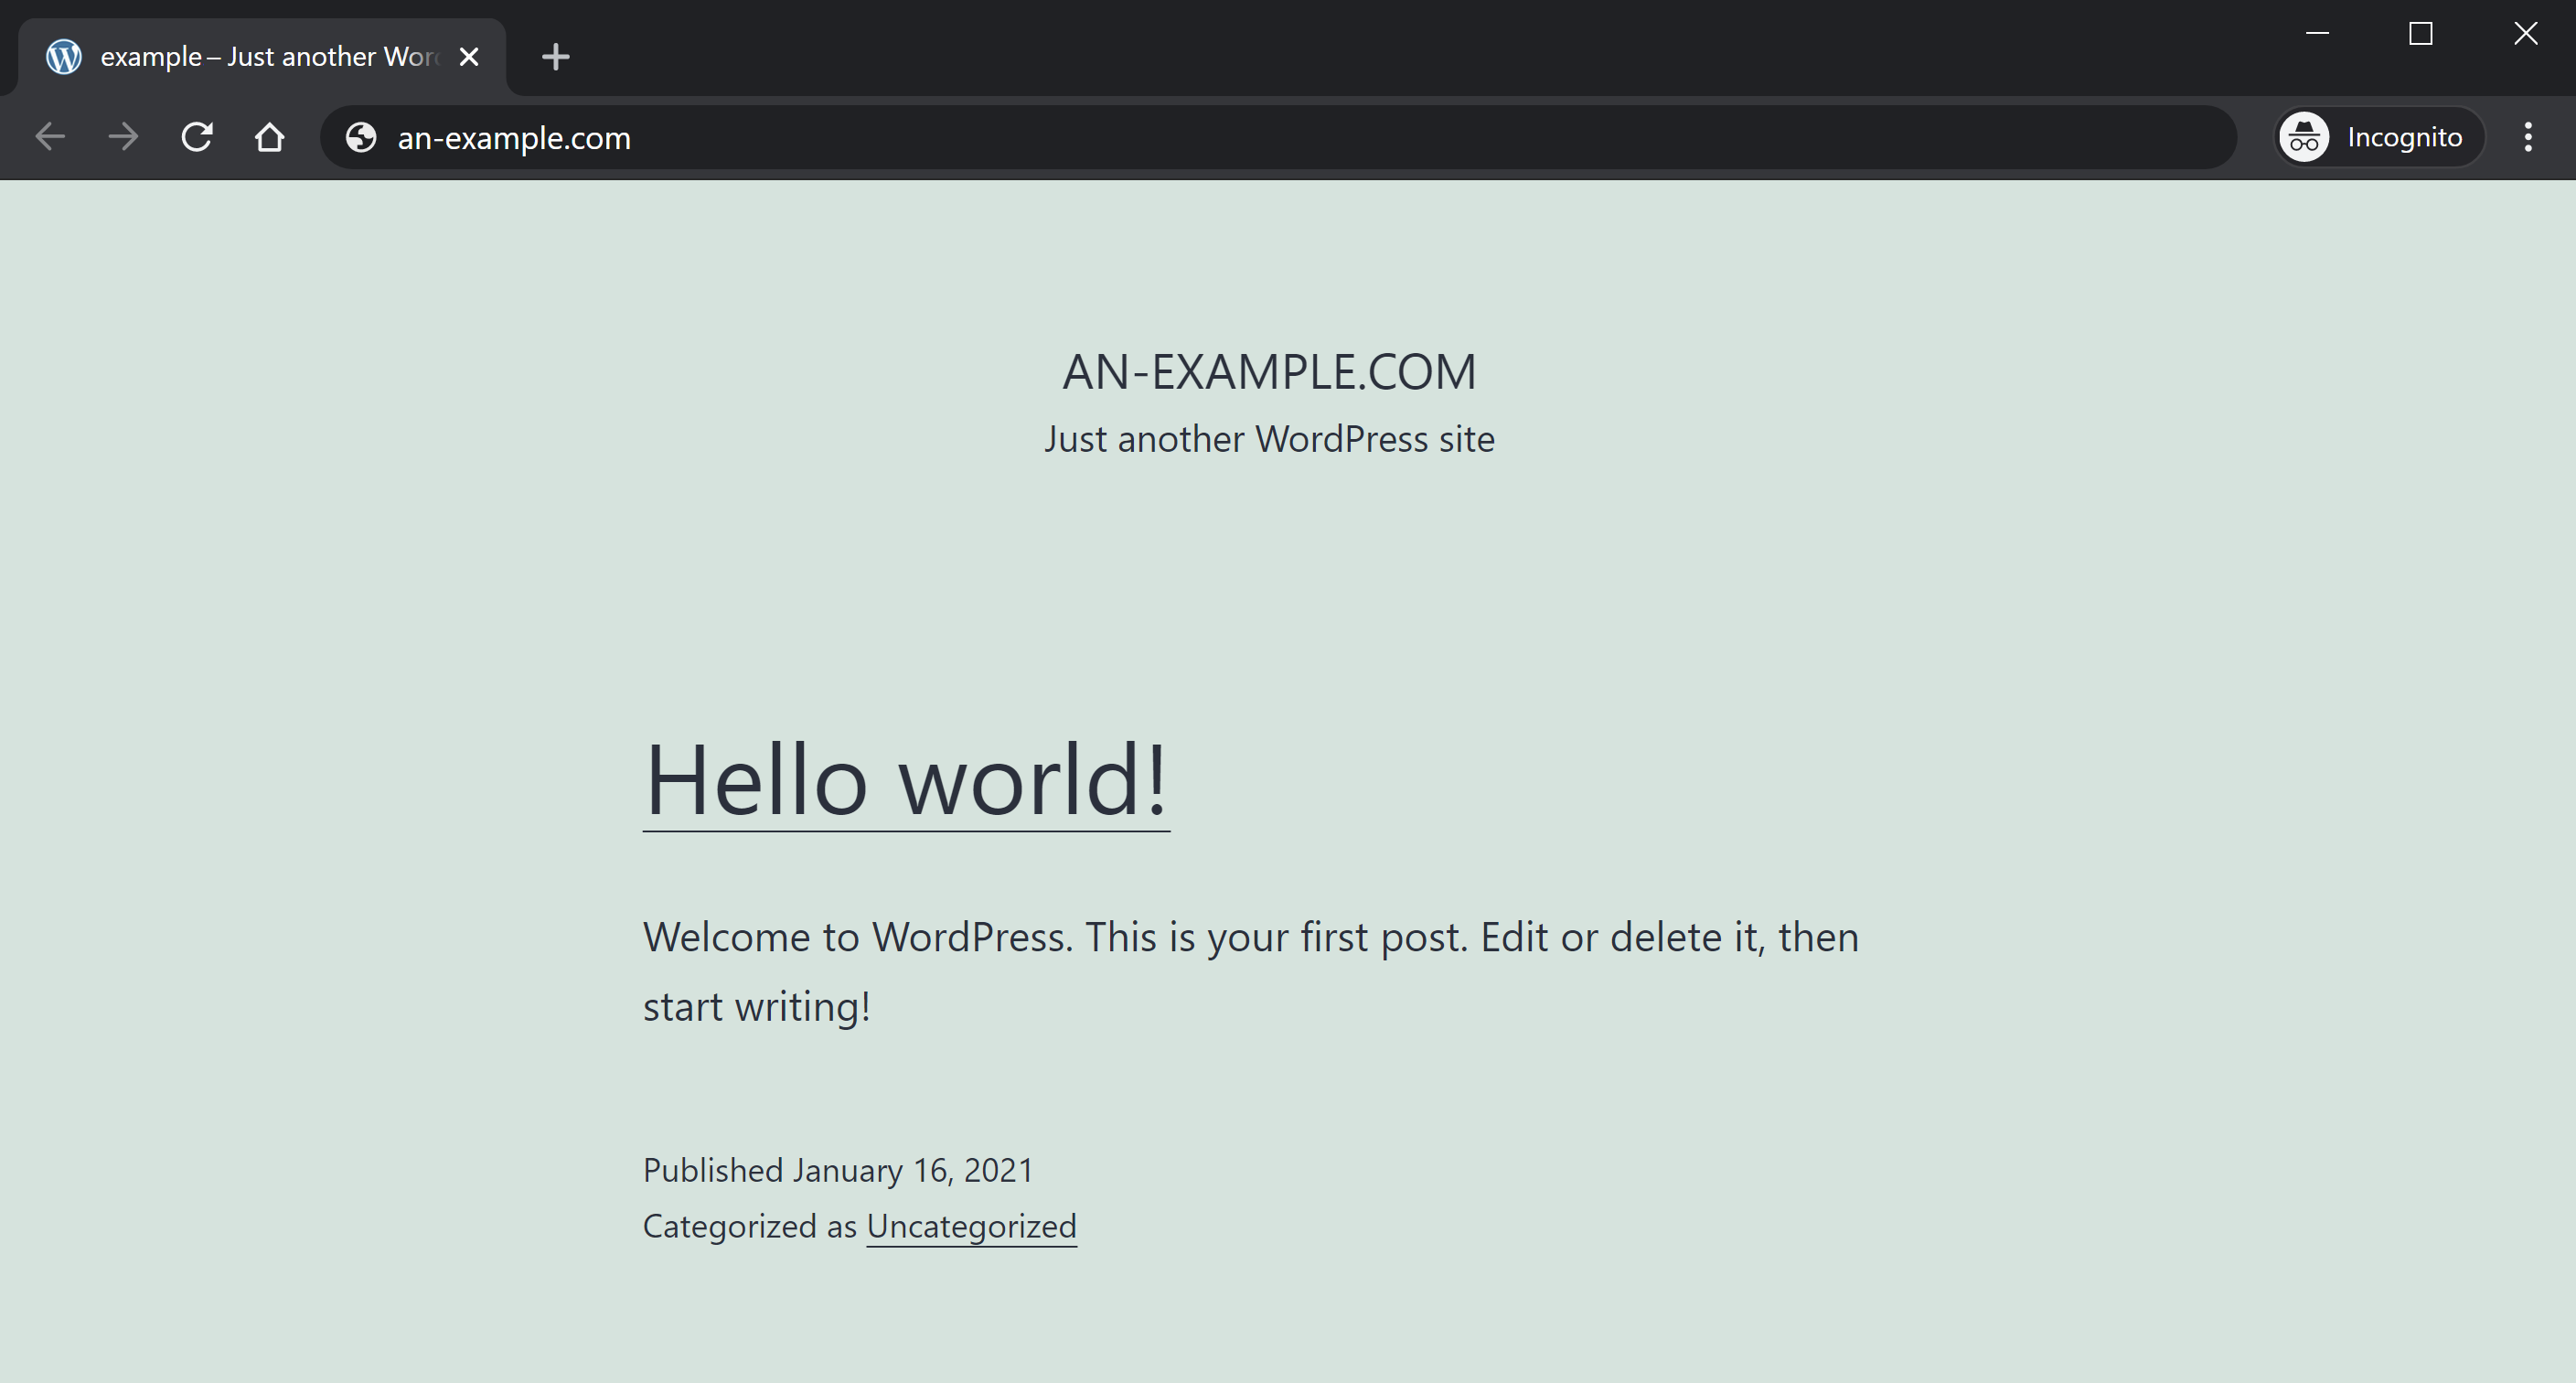
All that is left to do now is to visit our development site using the redirected URL.
http://an-example.com
And instead of seeing the clients holding page, as the rest of the internet does, we will see the development site on our vCanopy server.
Step 6. Remove the Hosts Redirect when finished
Don’t forget, once you are finished using the hosts redirect you need to remove it from your hosts file.


