


Default Time Zone and Security Update Settings
Out of the box, the default time zone for all servers is UTC, and 2.30AM for security reboots. You can easily set a different time zone and restart time if you would prefer to do so.
STEP 1. NAVIGATE TO SETTINGS > DEFAULT SERVER BUILD SETTINGS
Inside your account, head over to your settings page and click through to the “Default Server Build Settings” located on the left-hand side as pictured below:
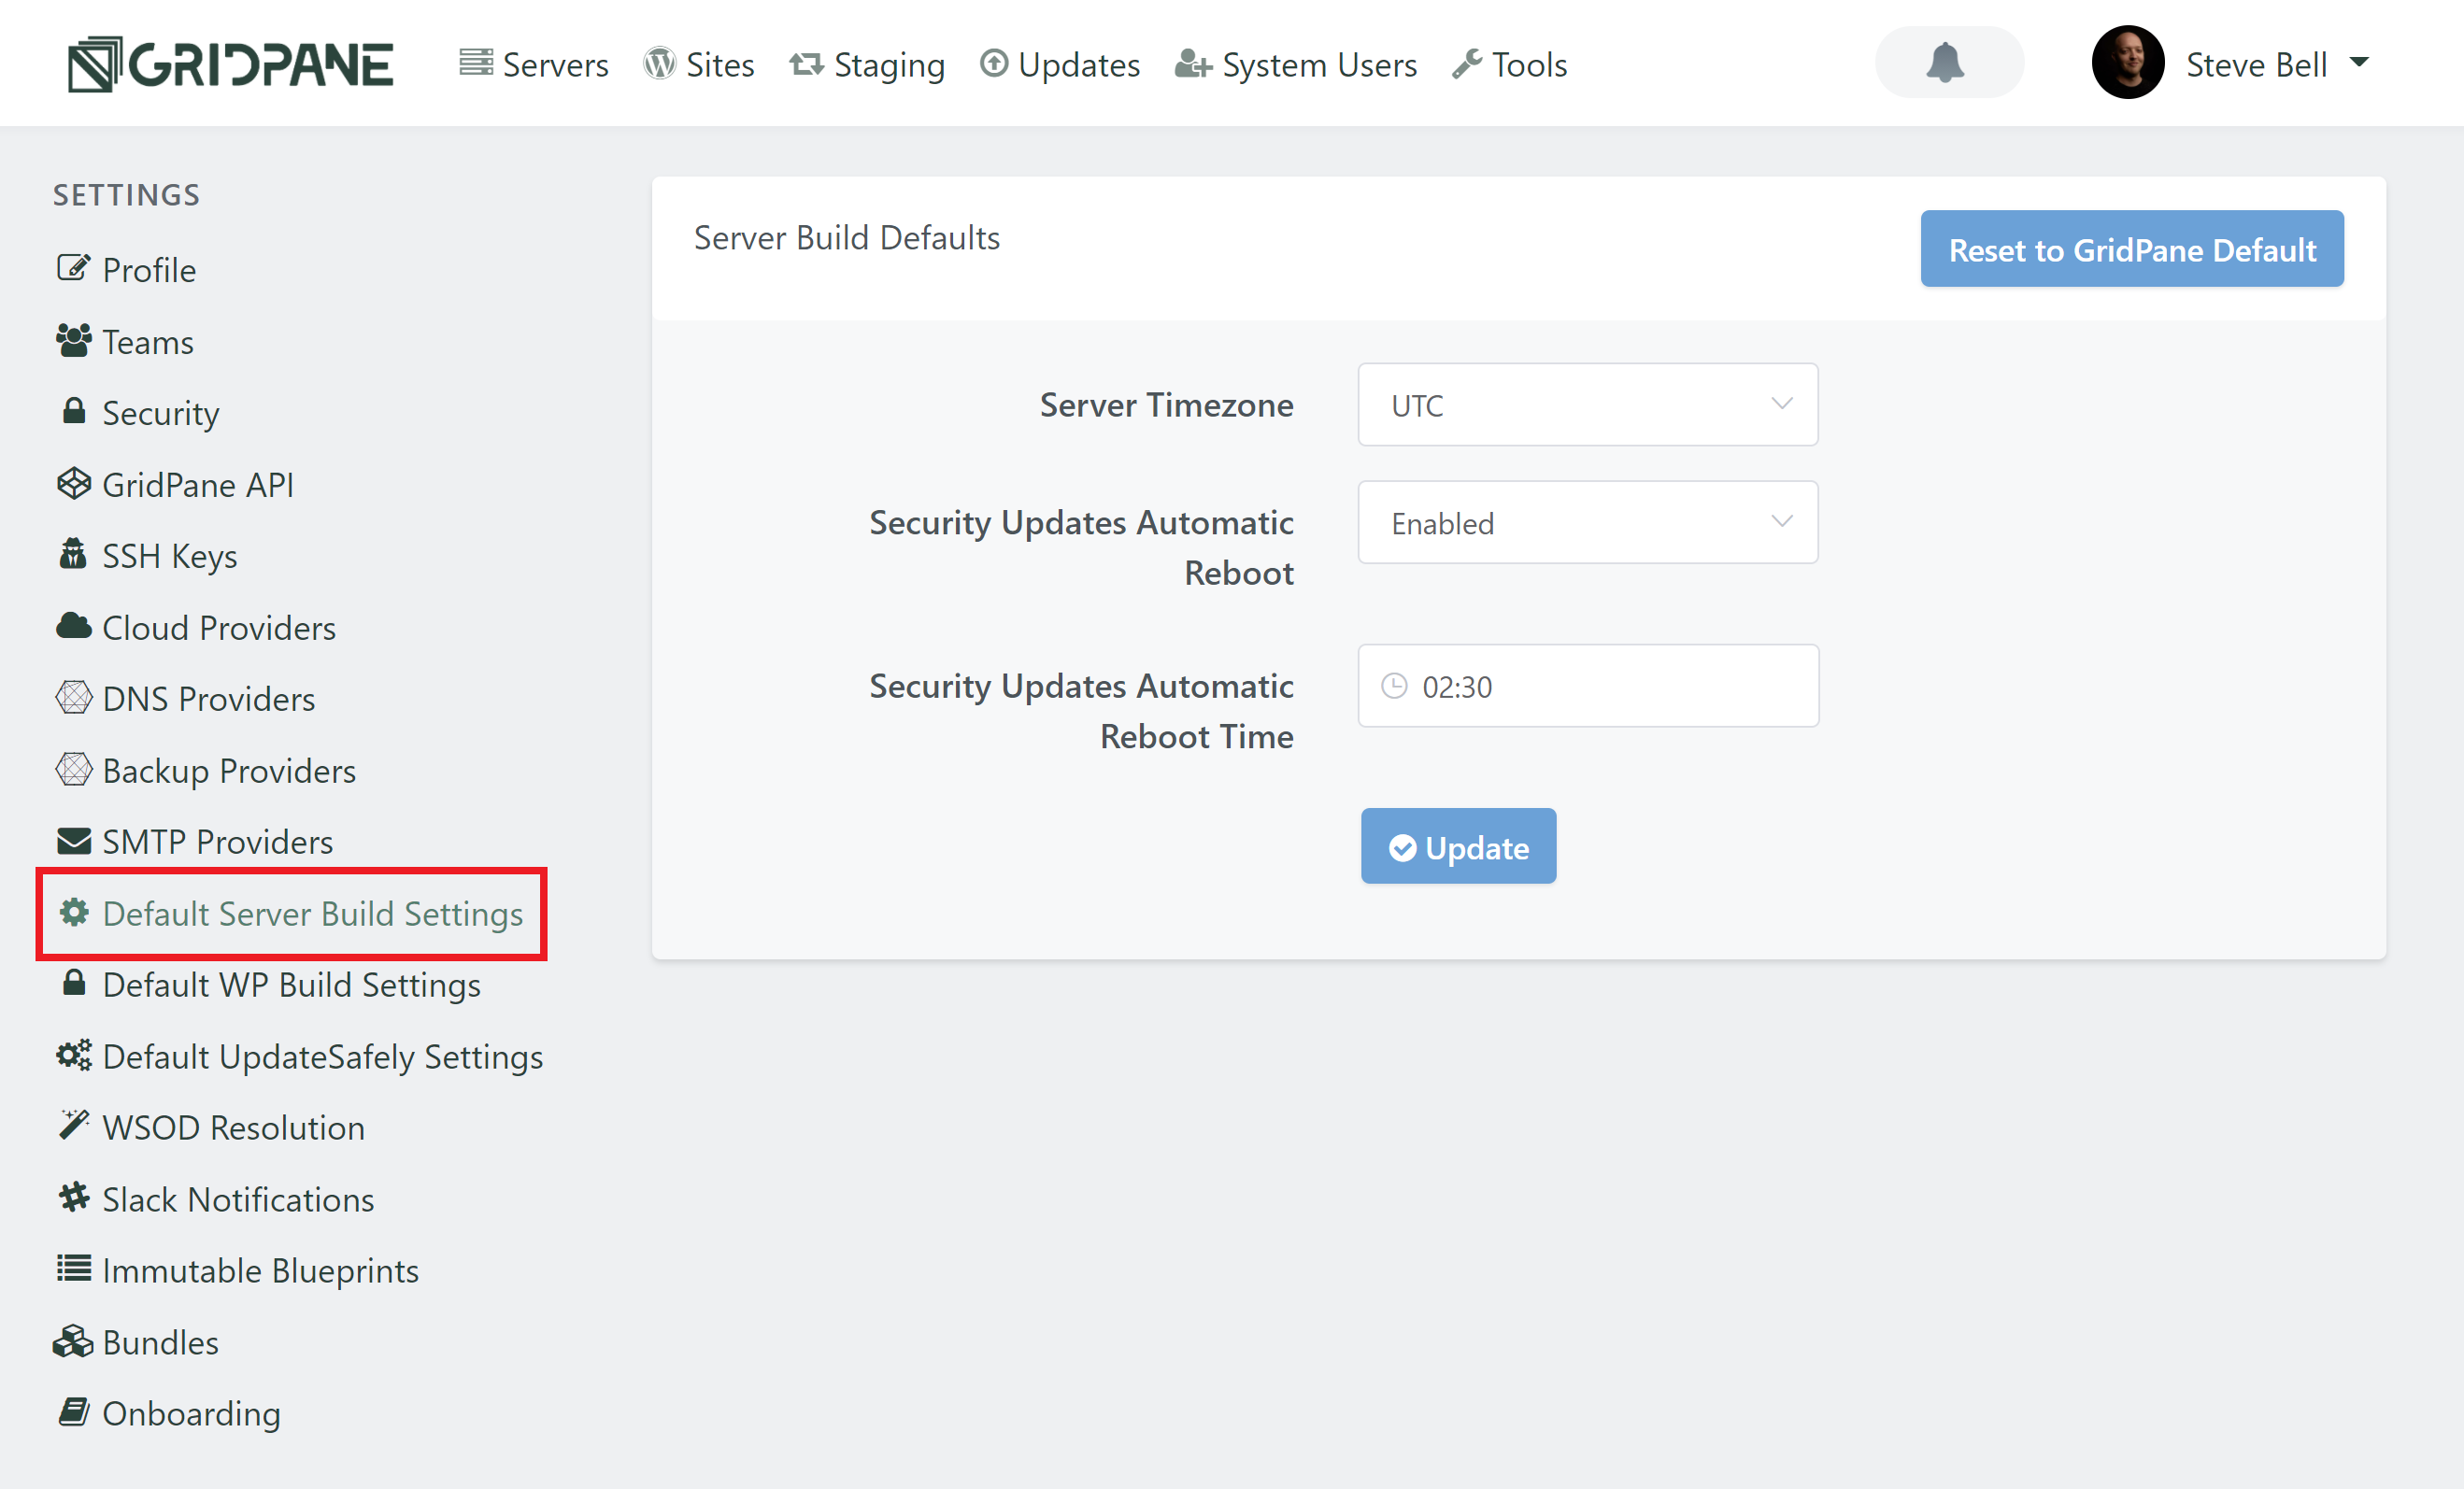
STEP 2. ADJUST YOUR SETTINGS
Here you can adjust your default settings to whichever time zone makes the most sense for your business.
You can also adjust the time when automatic security updates take place for those updates that require a server reboot.
RESET TO DEFAULT
If you’d like to reset to our standard default settings, simply click the big “Reset to vCanopy Default” button.
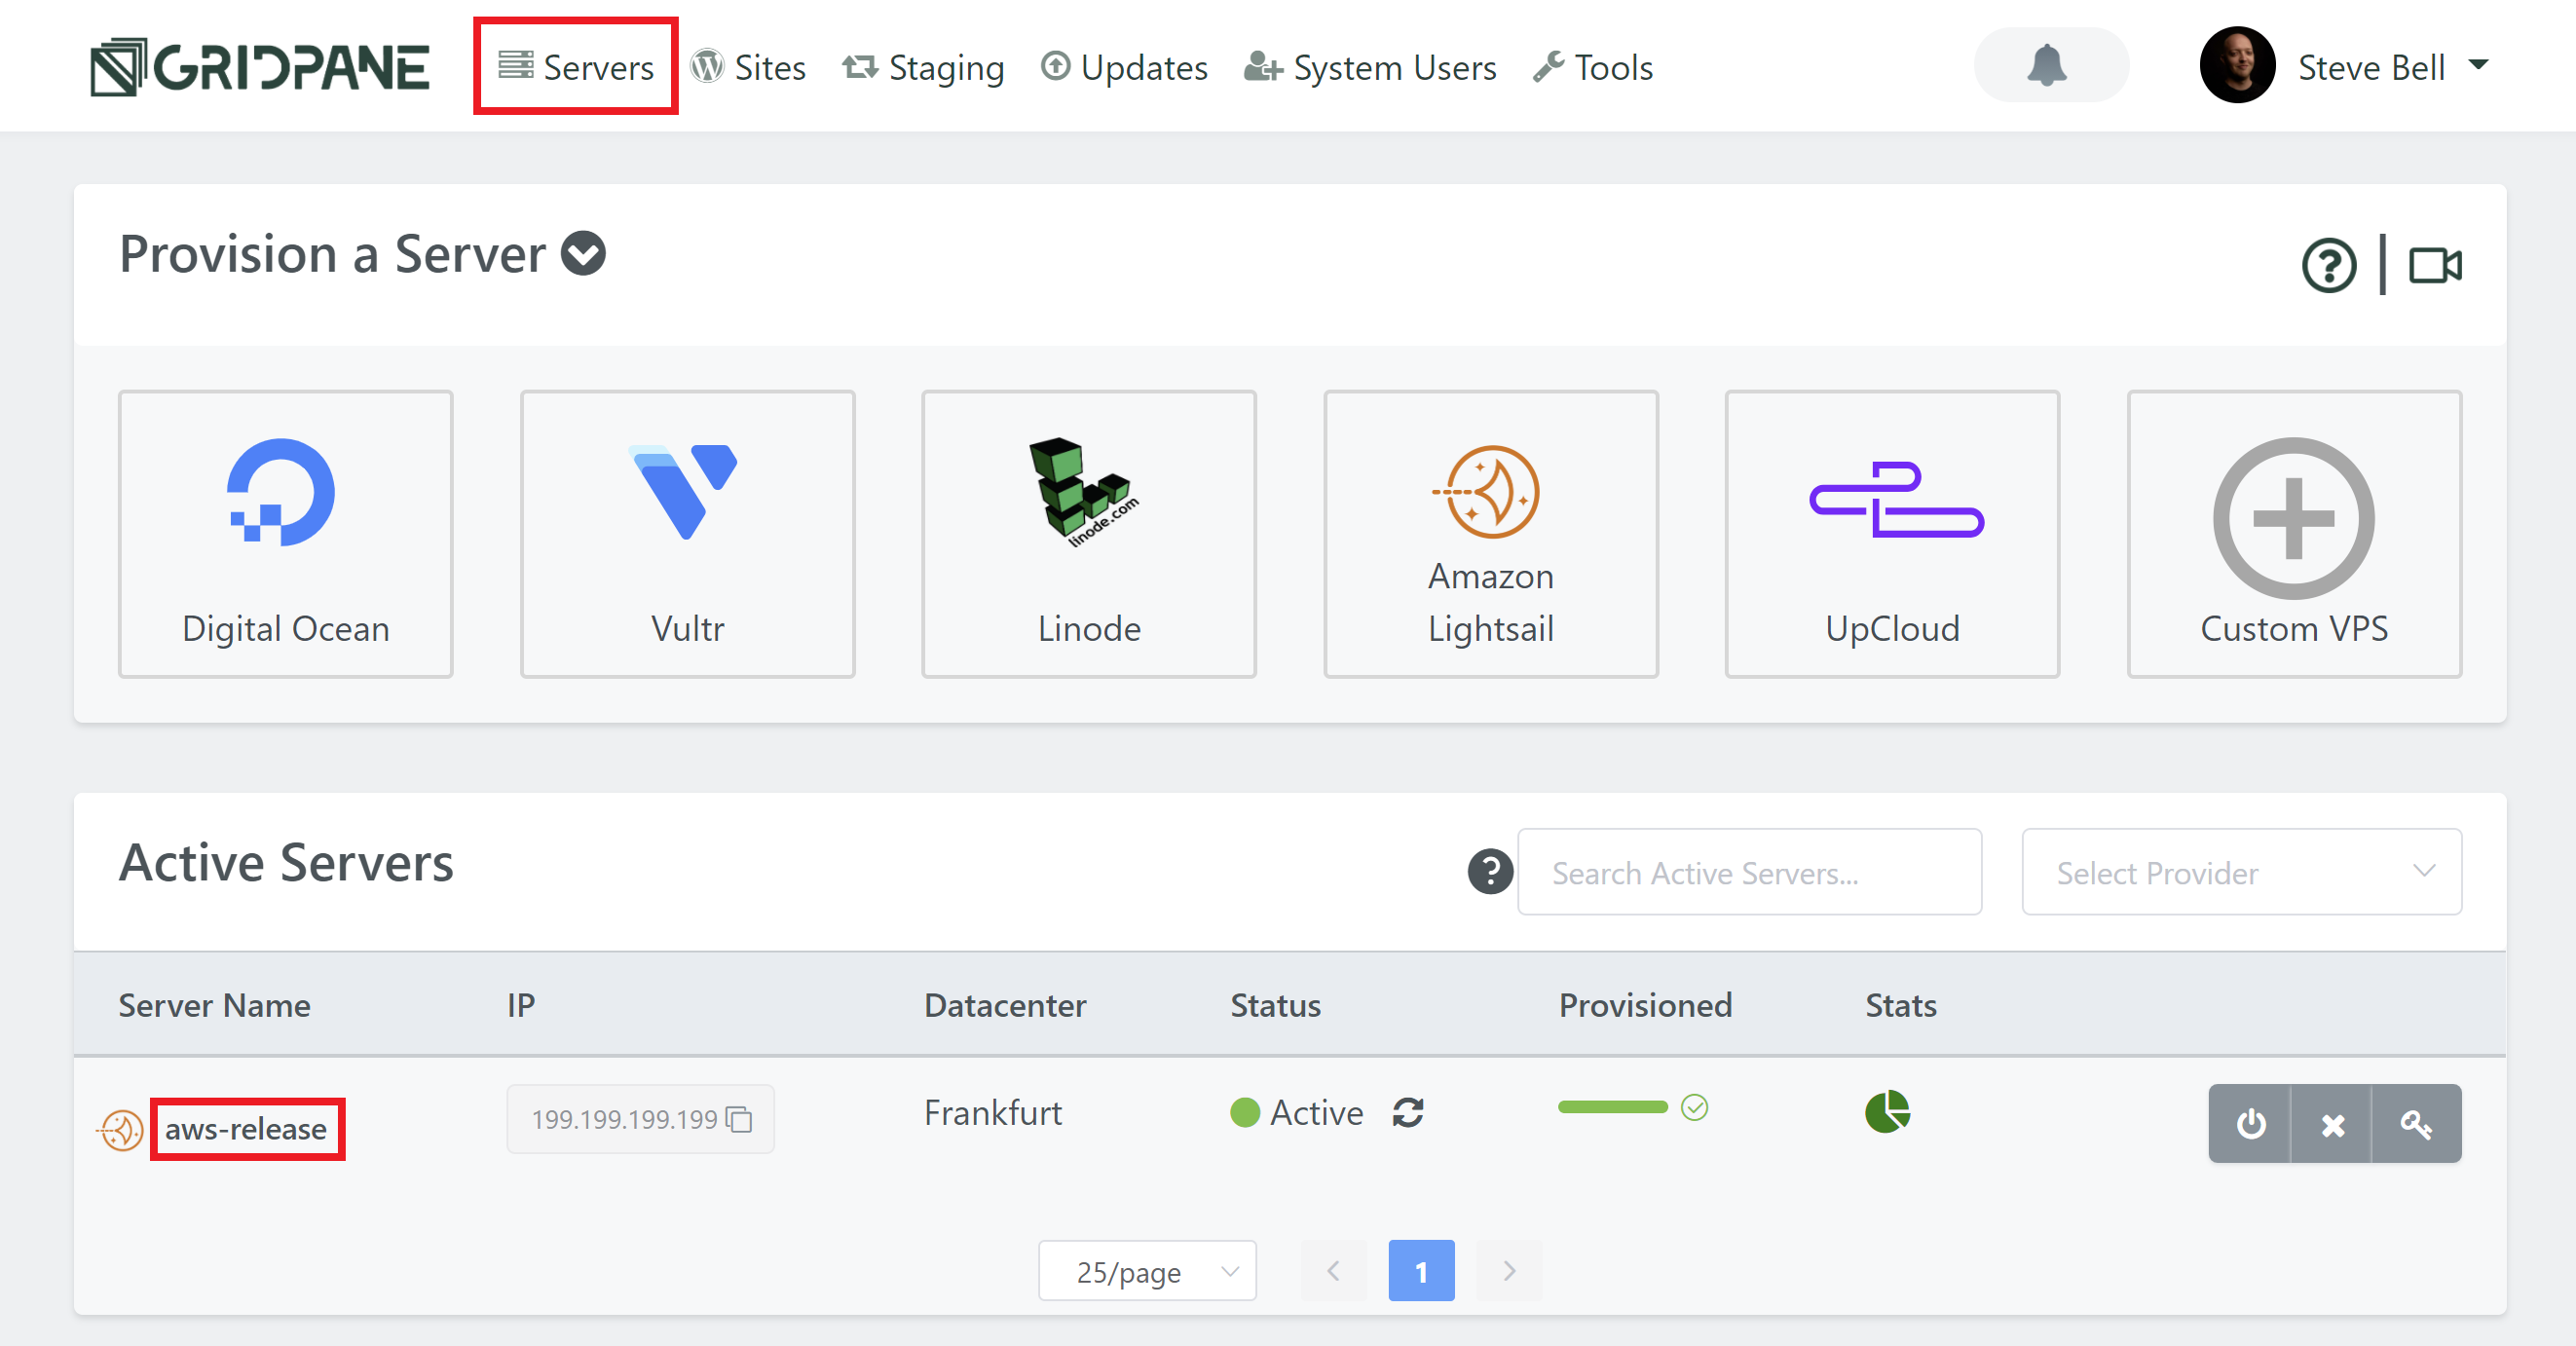
Server Specific Settings
The defaults you set above will be automatically applied to all new servers that you create. If you’d like to adjust those settings for an individual server (for example, if you have servers on the other side of the world), this is quick and easy.
STEP. 1 OPEN THE SERVER CUSTOMIZER
Head to your vCanopy dashboard and click through to the Servers page andclick on the server you wish to adjust:
STEP 2. ADJUST YOUR SETTINGS
First, hit the “Sync Settings” button if needed – if the settings appeared greyed out as below this will then allow you to change them once synced up:
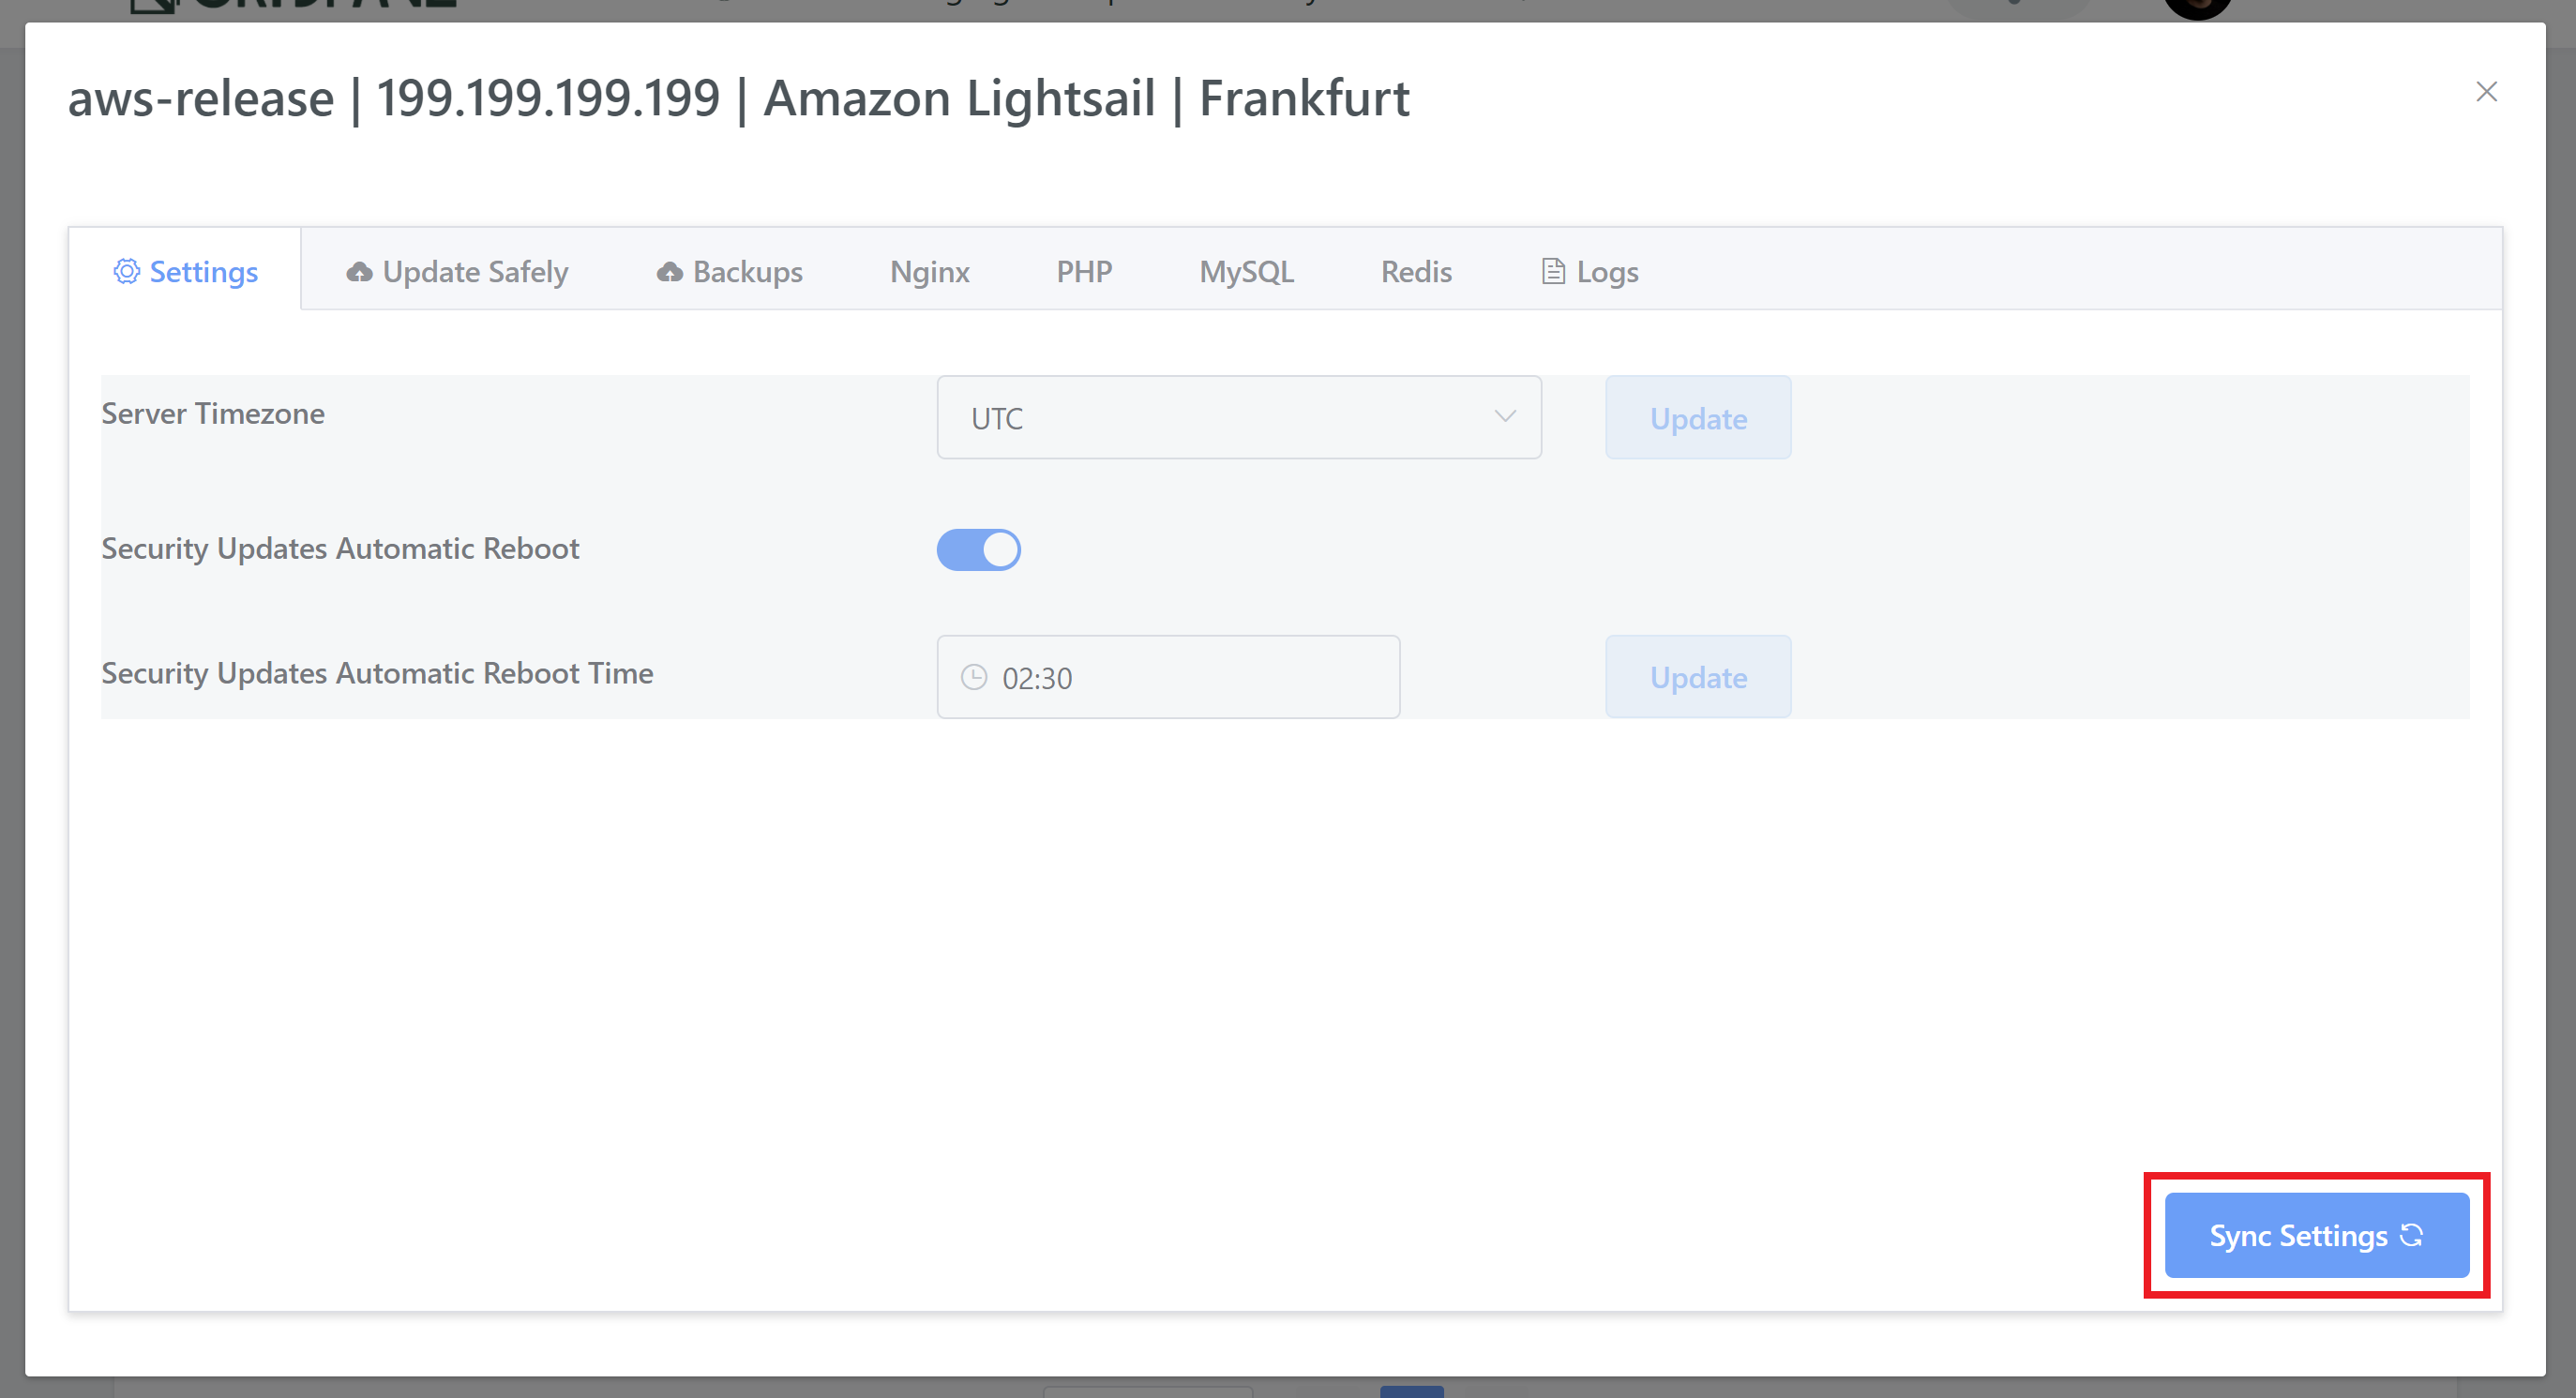
Now you can adjust your settings to so that they make sense for your server’s location.

Once you’ve made your choice simply hit the Update button and you’re all set!
That’s it, all done.