Introduction
This article will explain how to add an SSL Certificate from the free Let’s Encrypt Certificate Provider with vCanopy using a Proxy Challenge through one of our DNS Api integrations. This will allow your site to be served by the encrypted HTTPS protocol, and your visitors will also benefit from the speed increased enabled by HTTP2 which only works via HTTPS.
The Wildcard SSL will cover all *.{your.domain} and {your.domain}.
In this Knowledge base article we will be using an-example.site, so the wildcard SSL will cover the wildcard *.an-example.site and an-example.site.
That means any subdomain of one level to the root an-example.site will be covered.
To Grab a wildcard SSL you must use a DNS API integration method for provisioning your SSL, that is because Let’s Encrypt needs to add and test multiple records to ensure domain ownership.
Using a DNS API Proxy Challenge means that the domain you are grabbing an SSL for is not managed by the DNS provider, but instead you are using another domain that IS managed as a proxy, and using that other managed domains API credentials.
For this method to work you will need a domain that is managed by one of the DNS services with which we have integrations:
- Cloudflare (Free and Premium)
- DNSMadeEasy (Premium)
This method is an excellent way to still be able to use DNS API integrations for SSL provisioning when the domain in question is not managed.
As this is a DNS api integration method, it does not actually require any DNS records to point to the IP of the server hosting the site, which makes it perfect for provisioning SSLs during migrations or for testing before DNS changeover.
vCanopy does not enable/disable SSL for the site, but rather it manages SSL on a per-domain basis for each domain attached to a site. This means SSL management is done through the domains tab.
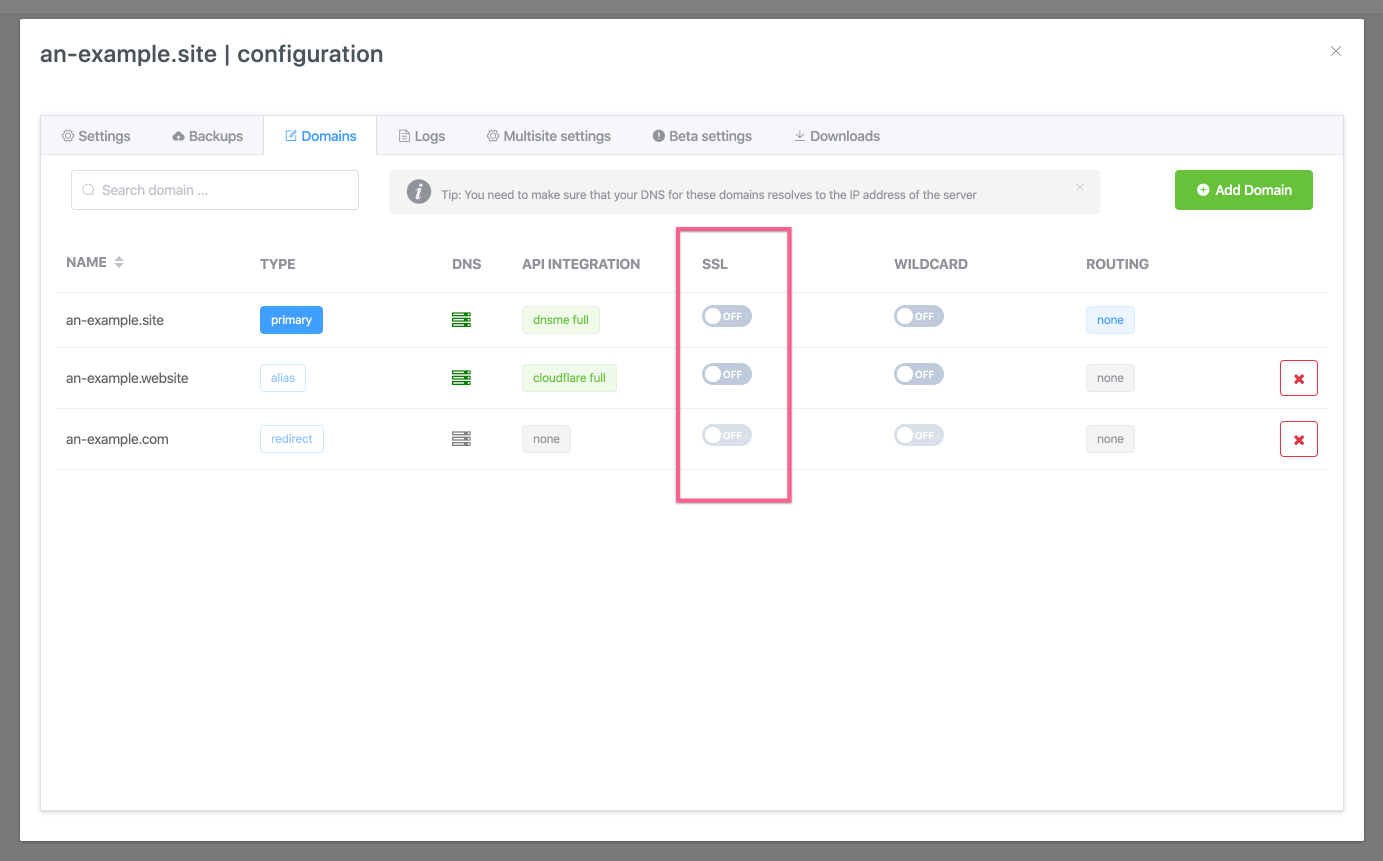
In this Knowledge Base article we will use a site’s primary domain to demonstrate, however the same functionality and process is true for any added Alias and Redirect domains.
Store your DNS Provider API Keys in vCanopy Copy your Cloudflare API credentials
Login to your Cloudflare account and add a site to be managed or select an already managed site, then go to the overview page.

Then find the API section near the bottom of the page on the right section of the page.
Click Get your API token:

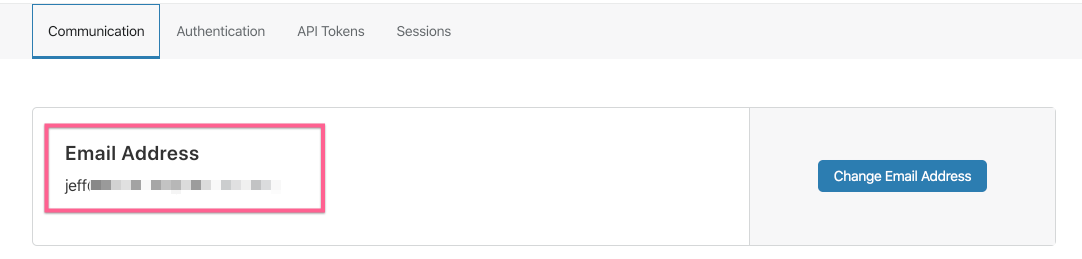
In the API section, copy your account email address from the Communication tab.
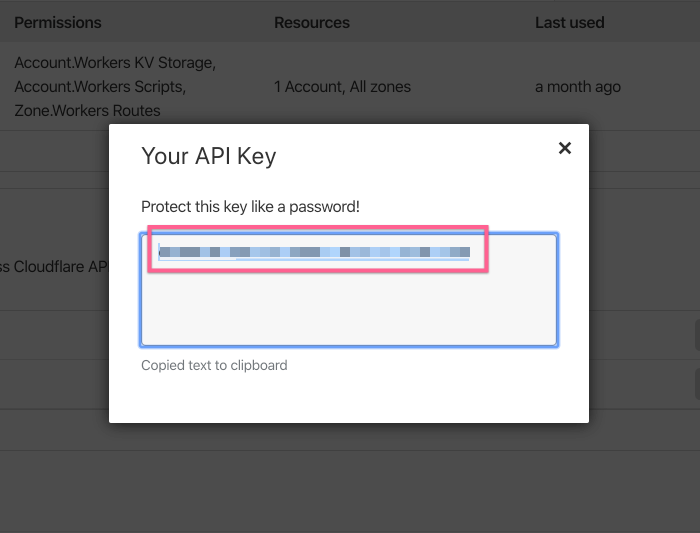
Then Click the API Tokens tab, and click View for the Global API Key:
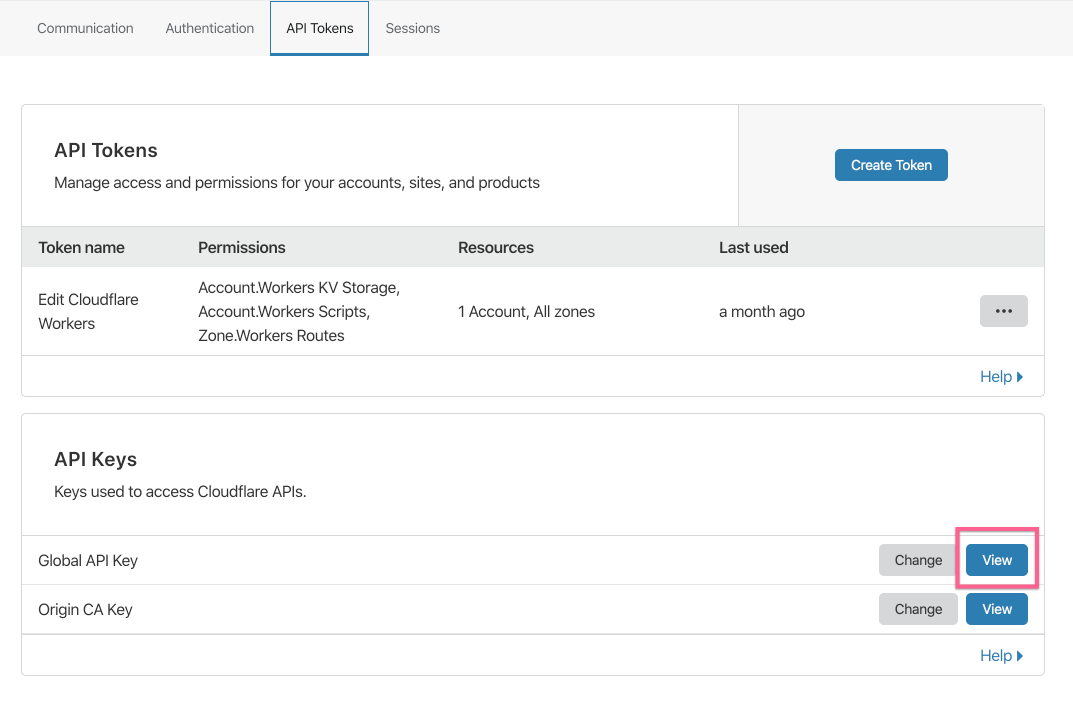
Copy your API Key:
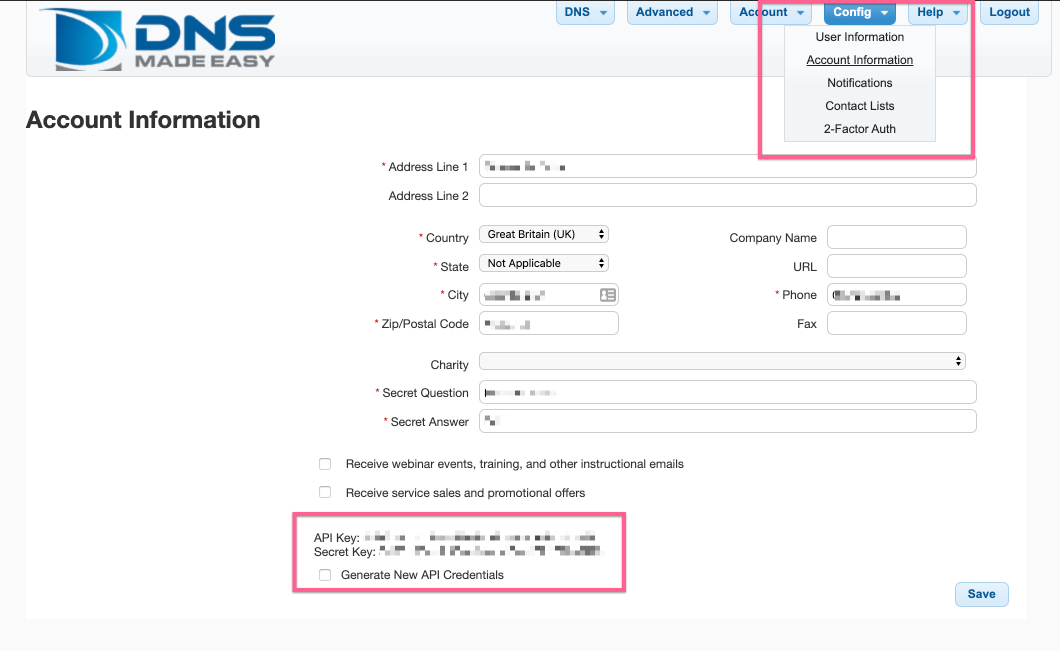
COPY YOUR DNSMADEEASY API CREDENTIALS
Log in to your DNSMadeEasy account and then go to the account information page.
Copy the API Key and API Secret from the bottom of the account information page.
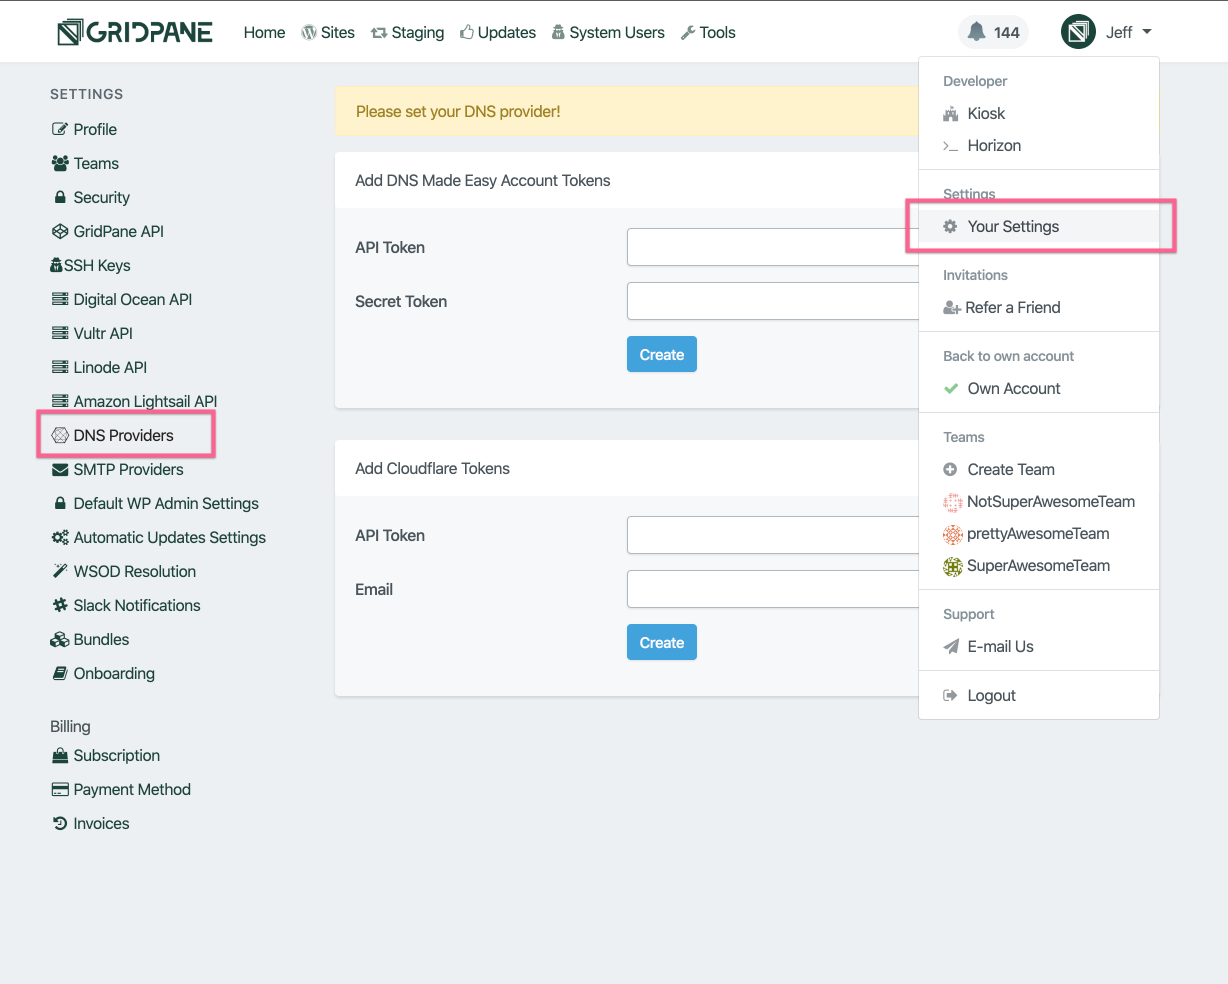
ENTER YOUR DNS SERVICE API CREDENTIALS INTO YOUR vCanopy SETTINGS
Navigate to the your vCanopy Settings page and DNS Providers section
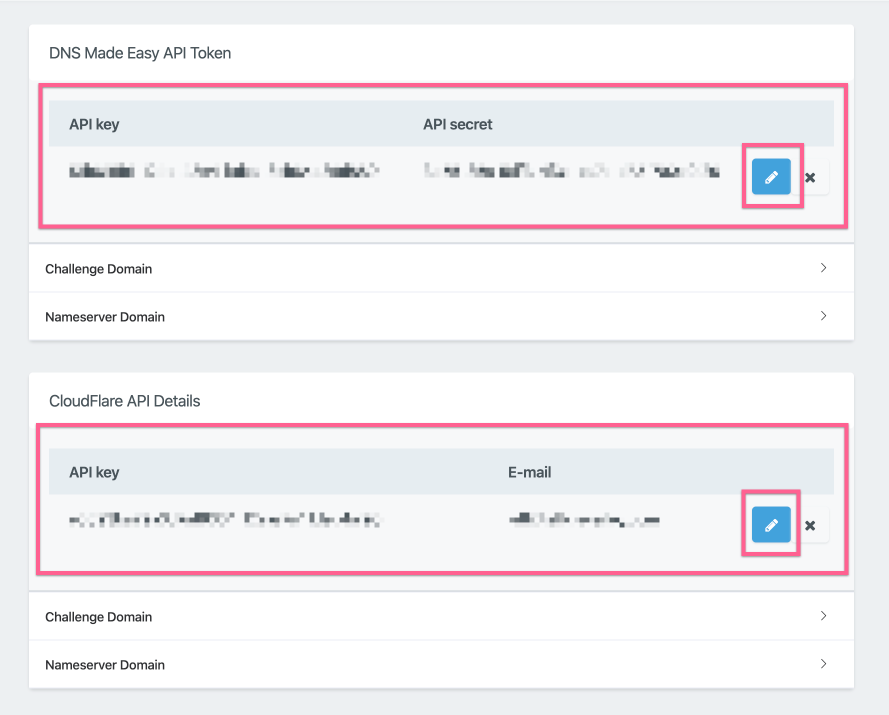
Enter your API credentials in their respective input fields and click Create

Your credentials will now be saved in your vCanopy settings.
If you want to edit your credentials, to change, update or delete them you can use the buttons in each panel.
Then pencil icon is for updating.
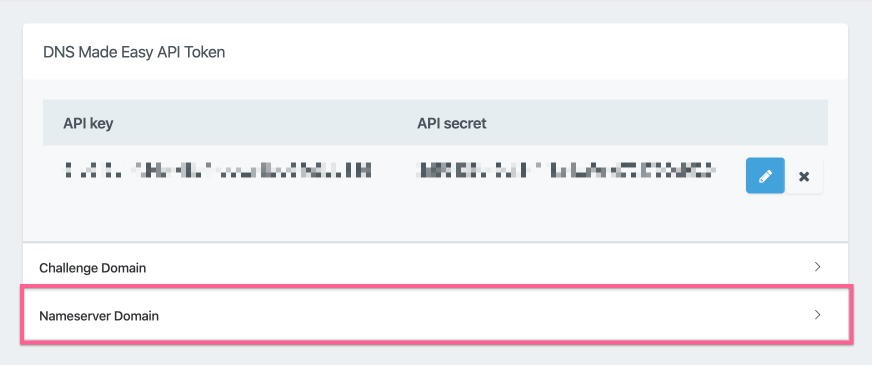
IF YOU ARE USING CUSTOM/VANITY NAMESERVERS AT YOUR DNS PROVIDER
If you are using custom/vanity nameservers at your DNS provider, you will need to add these to your vCanopy DNS API settings for that provider.
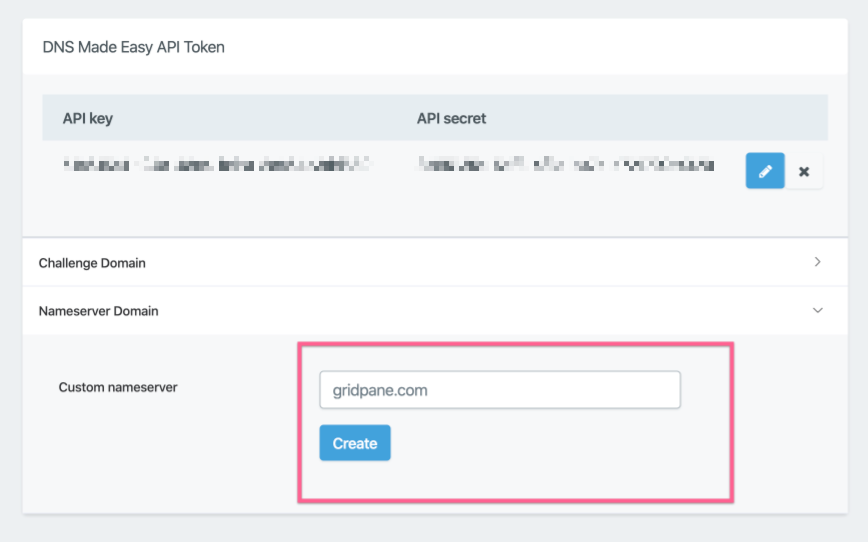
Click on the Nameserver Domain accordion dropdown for your DNS provider
You will only need to enter the root domain of your namesevers. So if your nameservers are ns1.vCanopy.com and ns2.vCanopy.com then you will add vCanopy.com and click create.
Step 1. Set the Challenge Domain in vCanopy DNS API settings
You will be selecting one domain from each of your DNS managed domains and setting that in the DNS Providers API settings in vCanopy settings.
This domain can be used by you for any domains that belong to any of your clients where you don’t have control of their domains, or they don’t wish to use a DNS management service. In the next step, we will discuss the CNAME settings you need to make sure they set at their unmanaged domains DNS records, but first, you need to set this domain in your vCanopy settings.
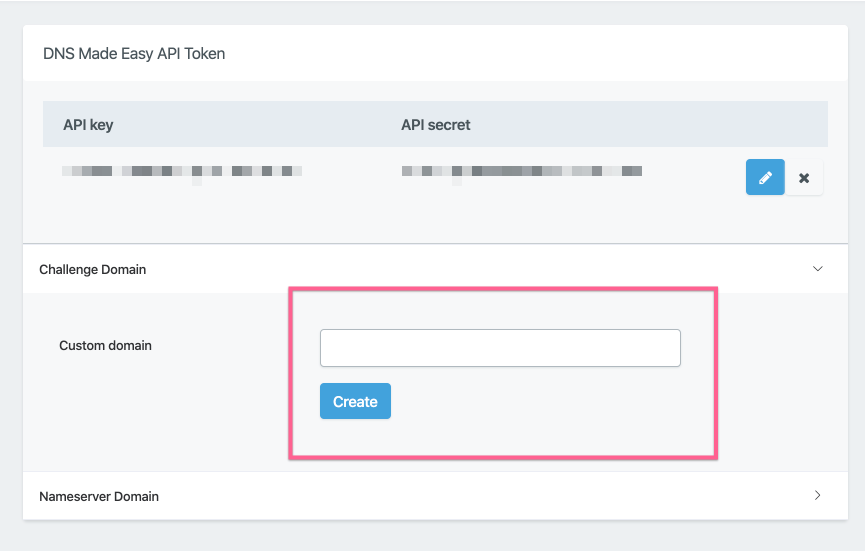
In your DNS Providers settings page, for each DNS provider, you will see the Challenge Domain accordion dropdown, click on it to display the input field.
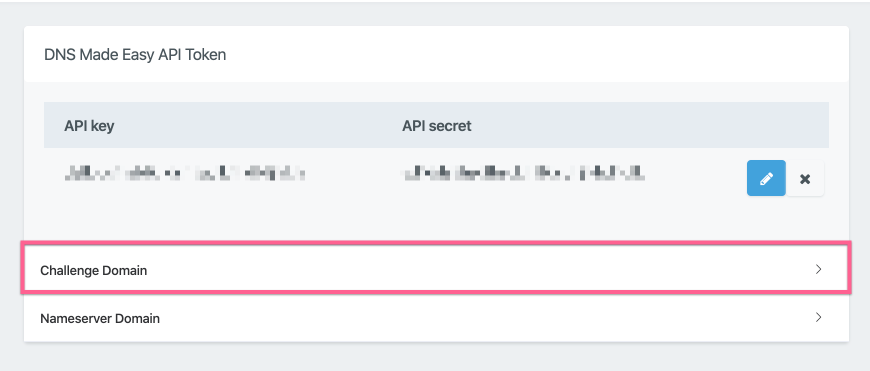
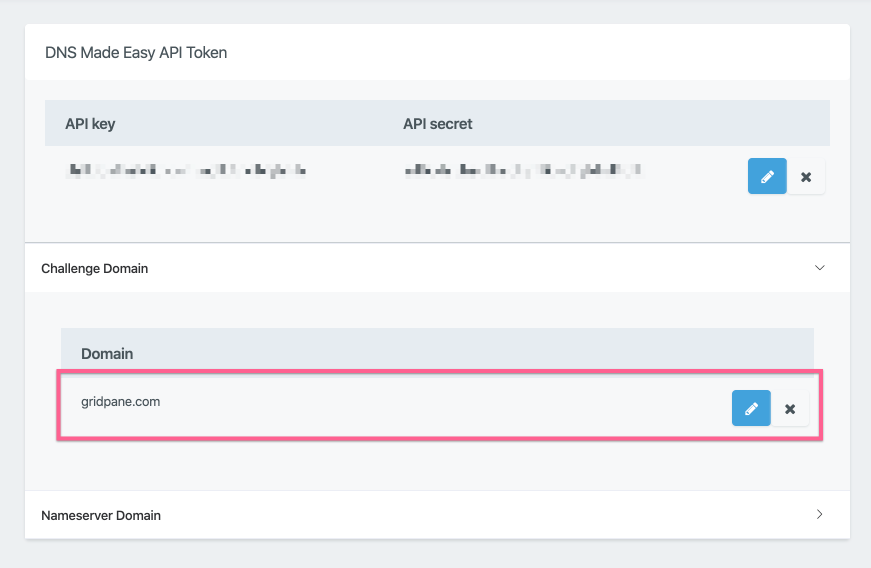
Add the managed domain that you wish to use into the custom domain input field and click Create:
Your challenge domain will now be saved, and you will see that DNSME/Cloudflare Challenge API integration method is now available from the domains manager for your domains. You can edit and update the domain by clicking the pencil icon, or delete it by clicking the cross.
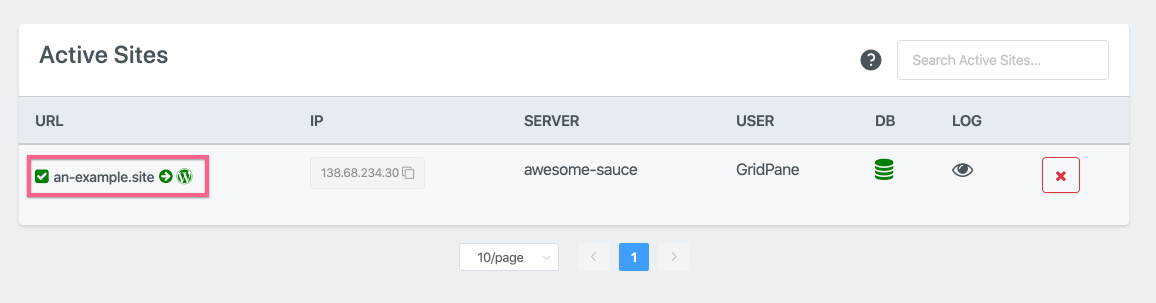
Step 3. Go to the Sites Section of the vCanopy Control Panel
Click on the sites link in the vCanopy main menu to go to the Sites management page.

Step 4. Open the Site Customization Panel for your Active site
In the Active Sites panel, click on the domain in the URL column to open the Site Customization pop-up box for the site you wish to update.
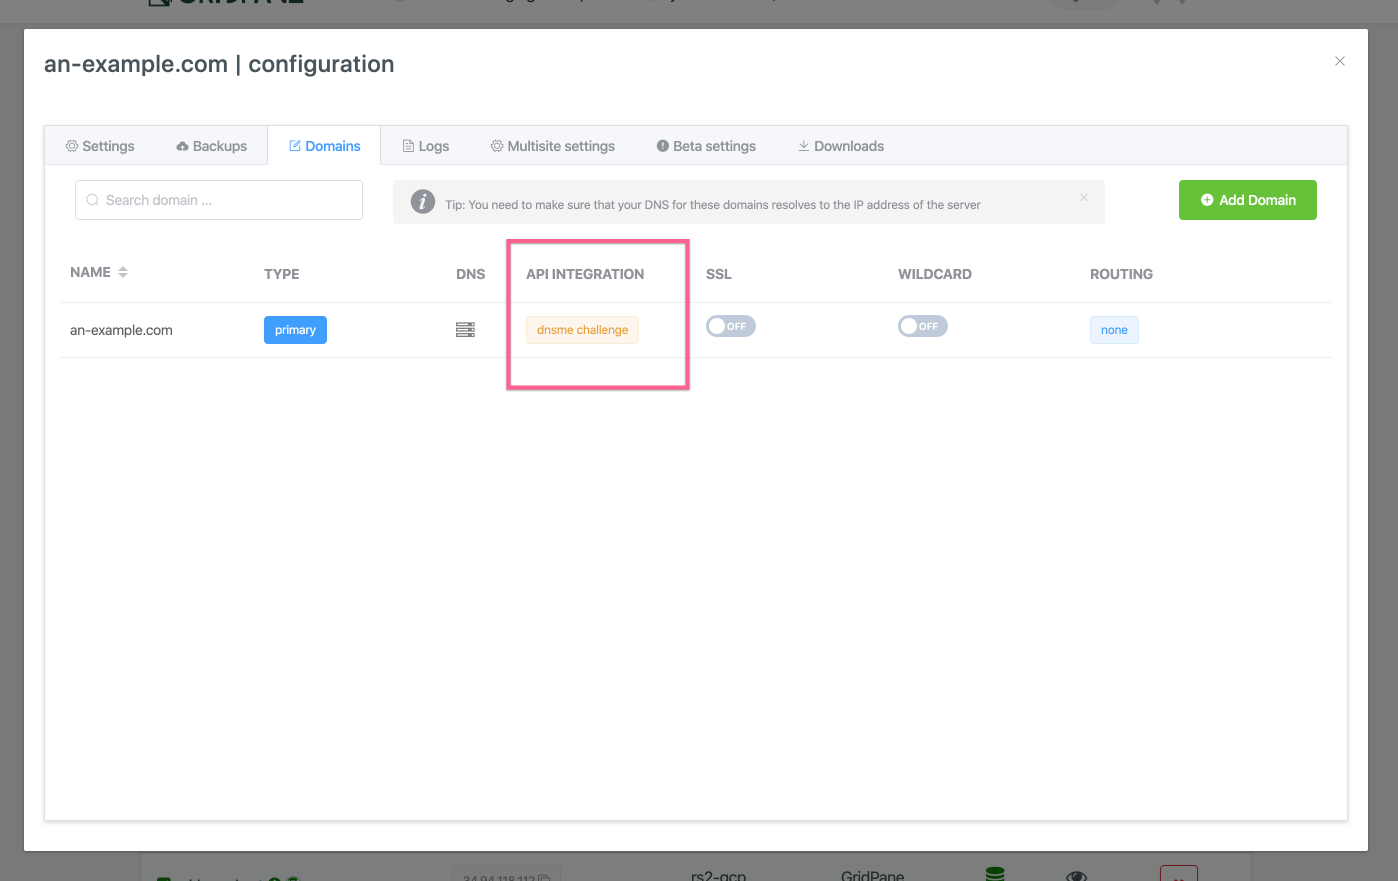
Step 5. Ensure Domain API Integration is set to Challenge Only
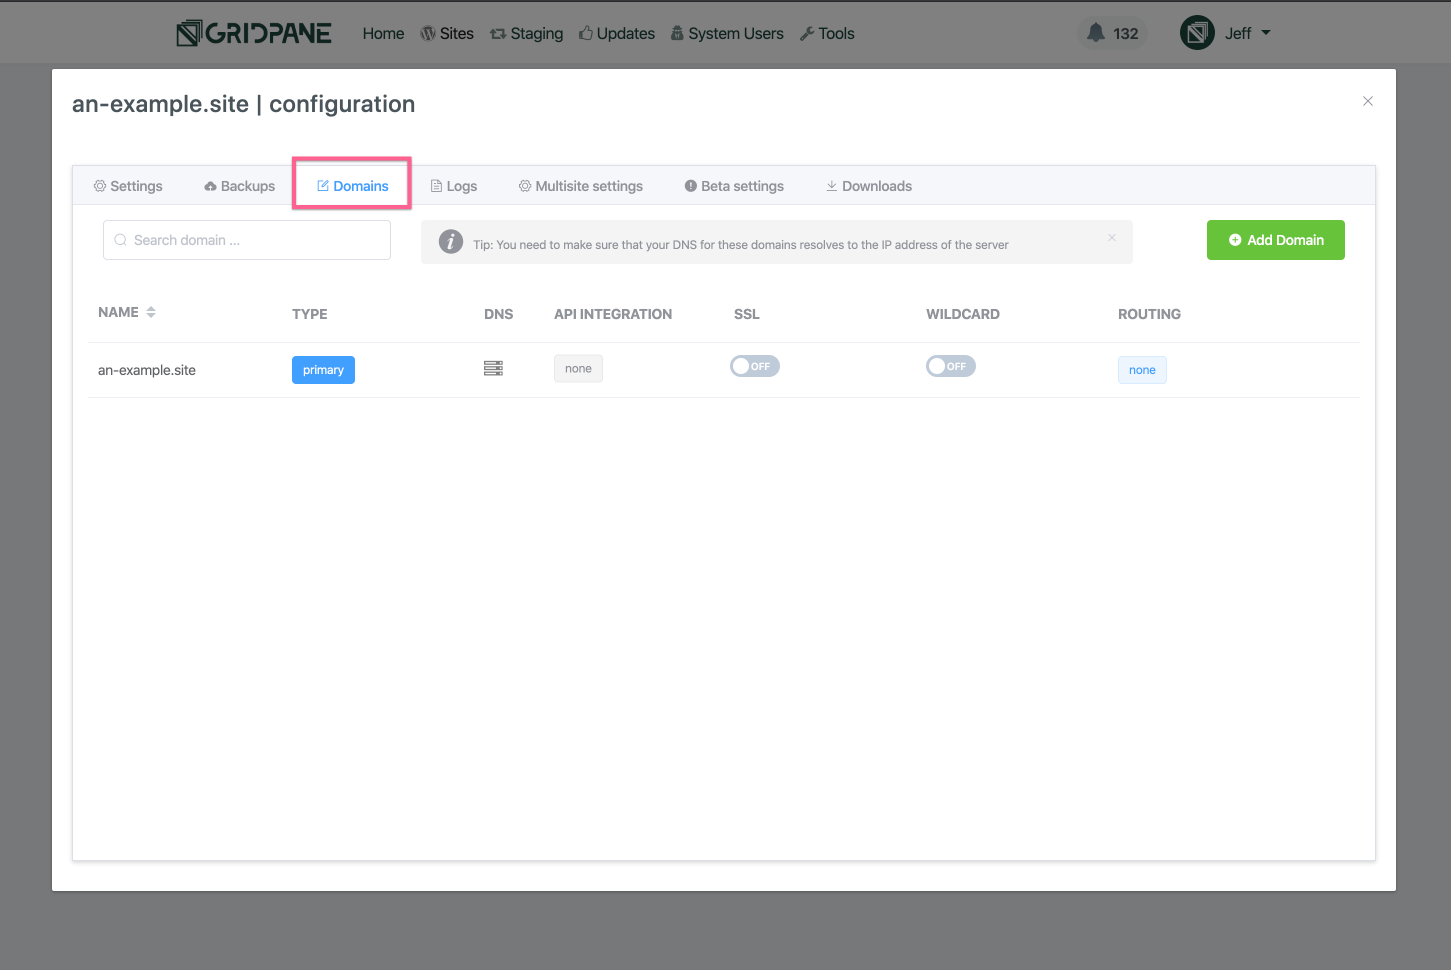
Open the domains manager tab of the site customizer:
If the API Integration of the domain you wish to enable an SSL for is set to None then click on the grey None box:
This will open a modal window where you can choose either Cloudflare Challenge Only or DNSME Challenge Only to use DNS API domain verification by Proxy Challenge for your SSL provision:

Once you have selected the DNS API Challenge only integration it should show in a green box on the domain row.
Cloudflare Challenge Only:

DNSME Challenge Only:
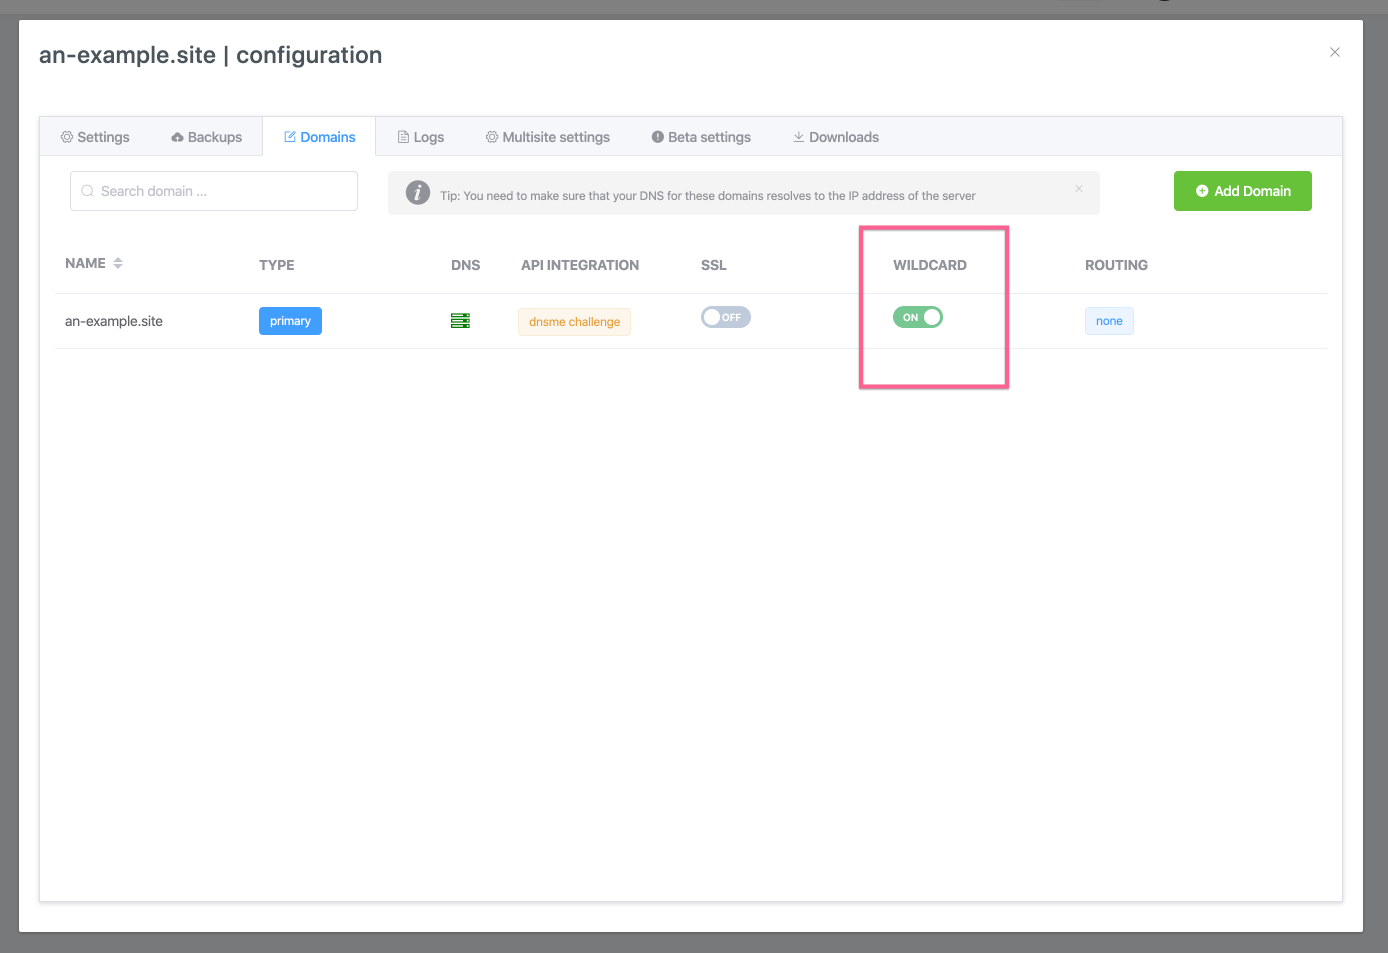
Step 6. Enable Domain Wildcard configuration
At the moment, with the wildcard toggle for your domain toggled to off the domain is configured as a standard Nginx virtual server. This means that the server is configured to server an-example.site and www.an-example.site.
(All vCanopy domains are automatically configured to include the www host domain).
For the server to be able to serve all subdomains of your root domain via a wildcard configuration you will need to reconfigure Nginx, luckily that is just a toggle away.
Locate the Wildcard toggle for your domain:

Toggle wildcard on to enable the server wildcard configuration:
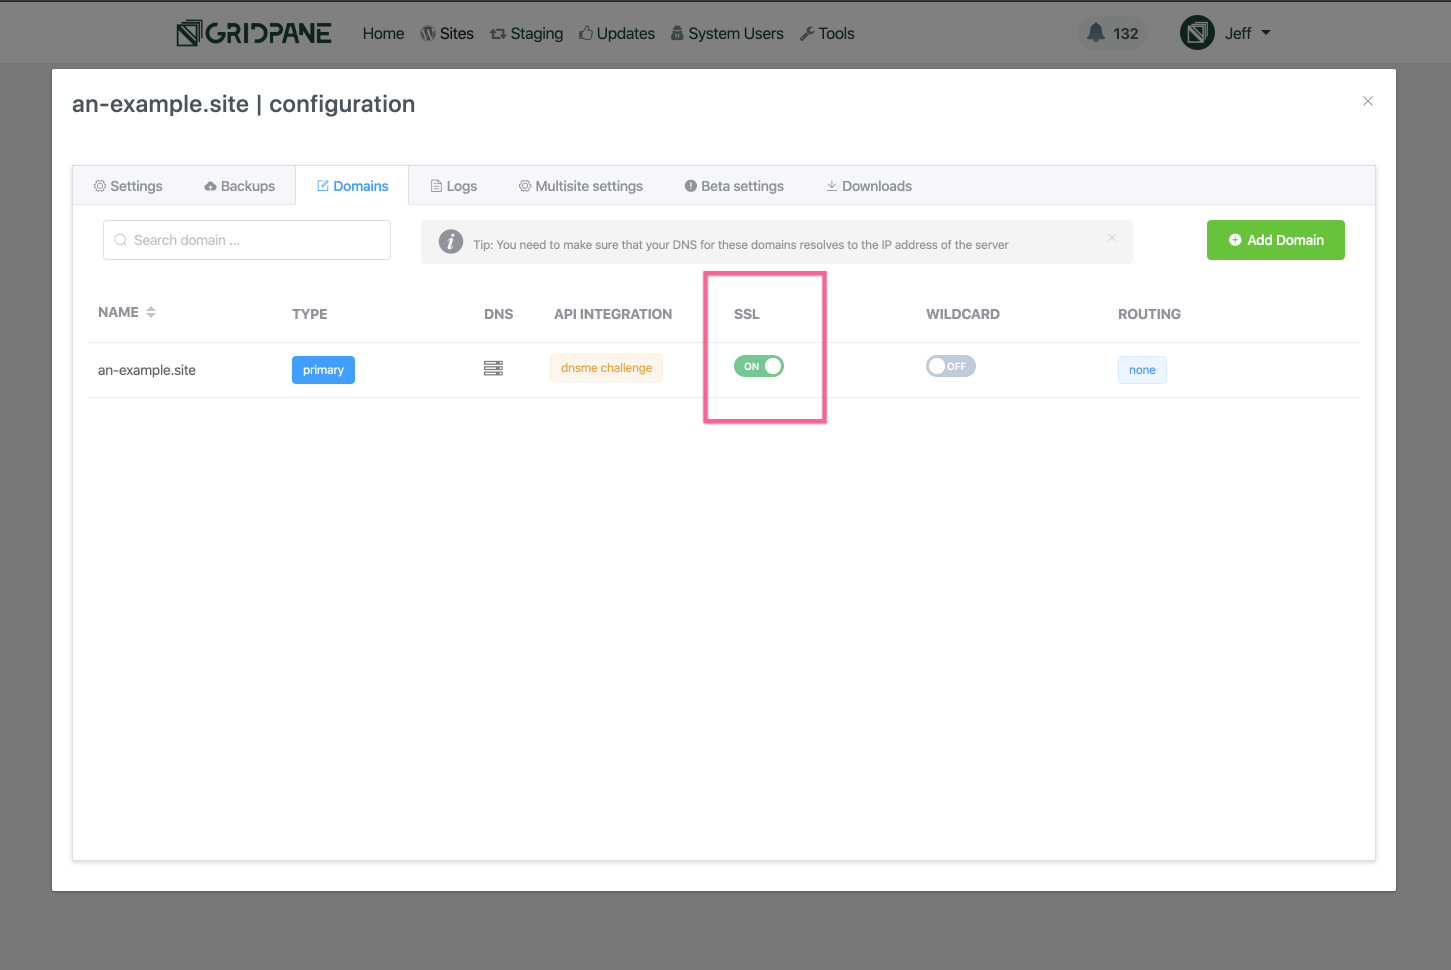
Step 7. Enable SSL
Locate the SSL toggle for the domain that you wish to provision an SSL for:
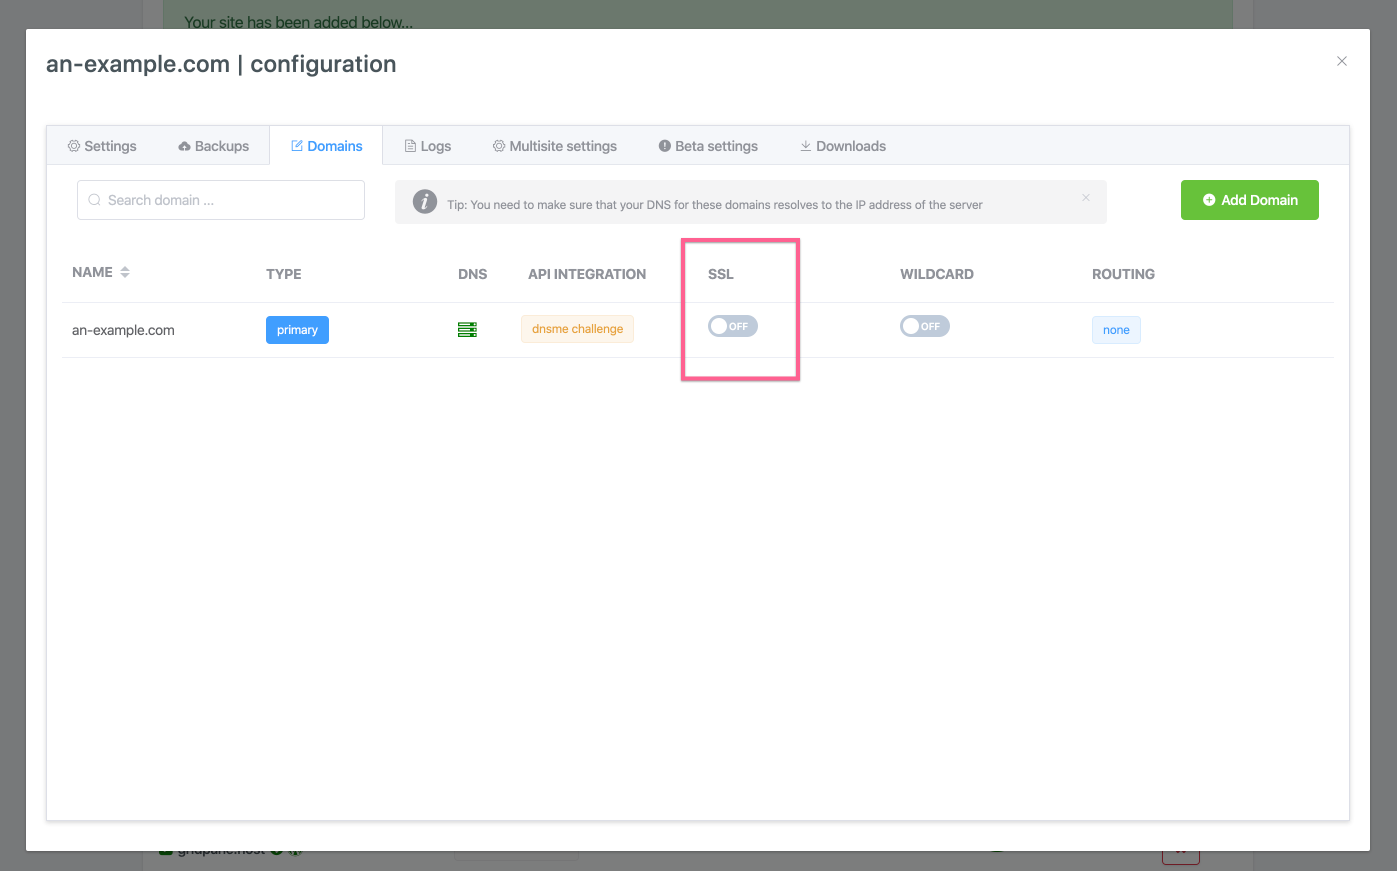
Toggle it on and the settings modal will open.
This will present you with options to do a dry run (recommended) and select if you want to ”Include Database Rewrites”:
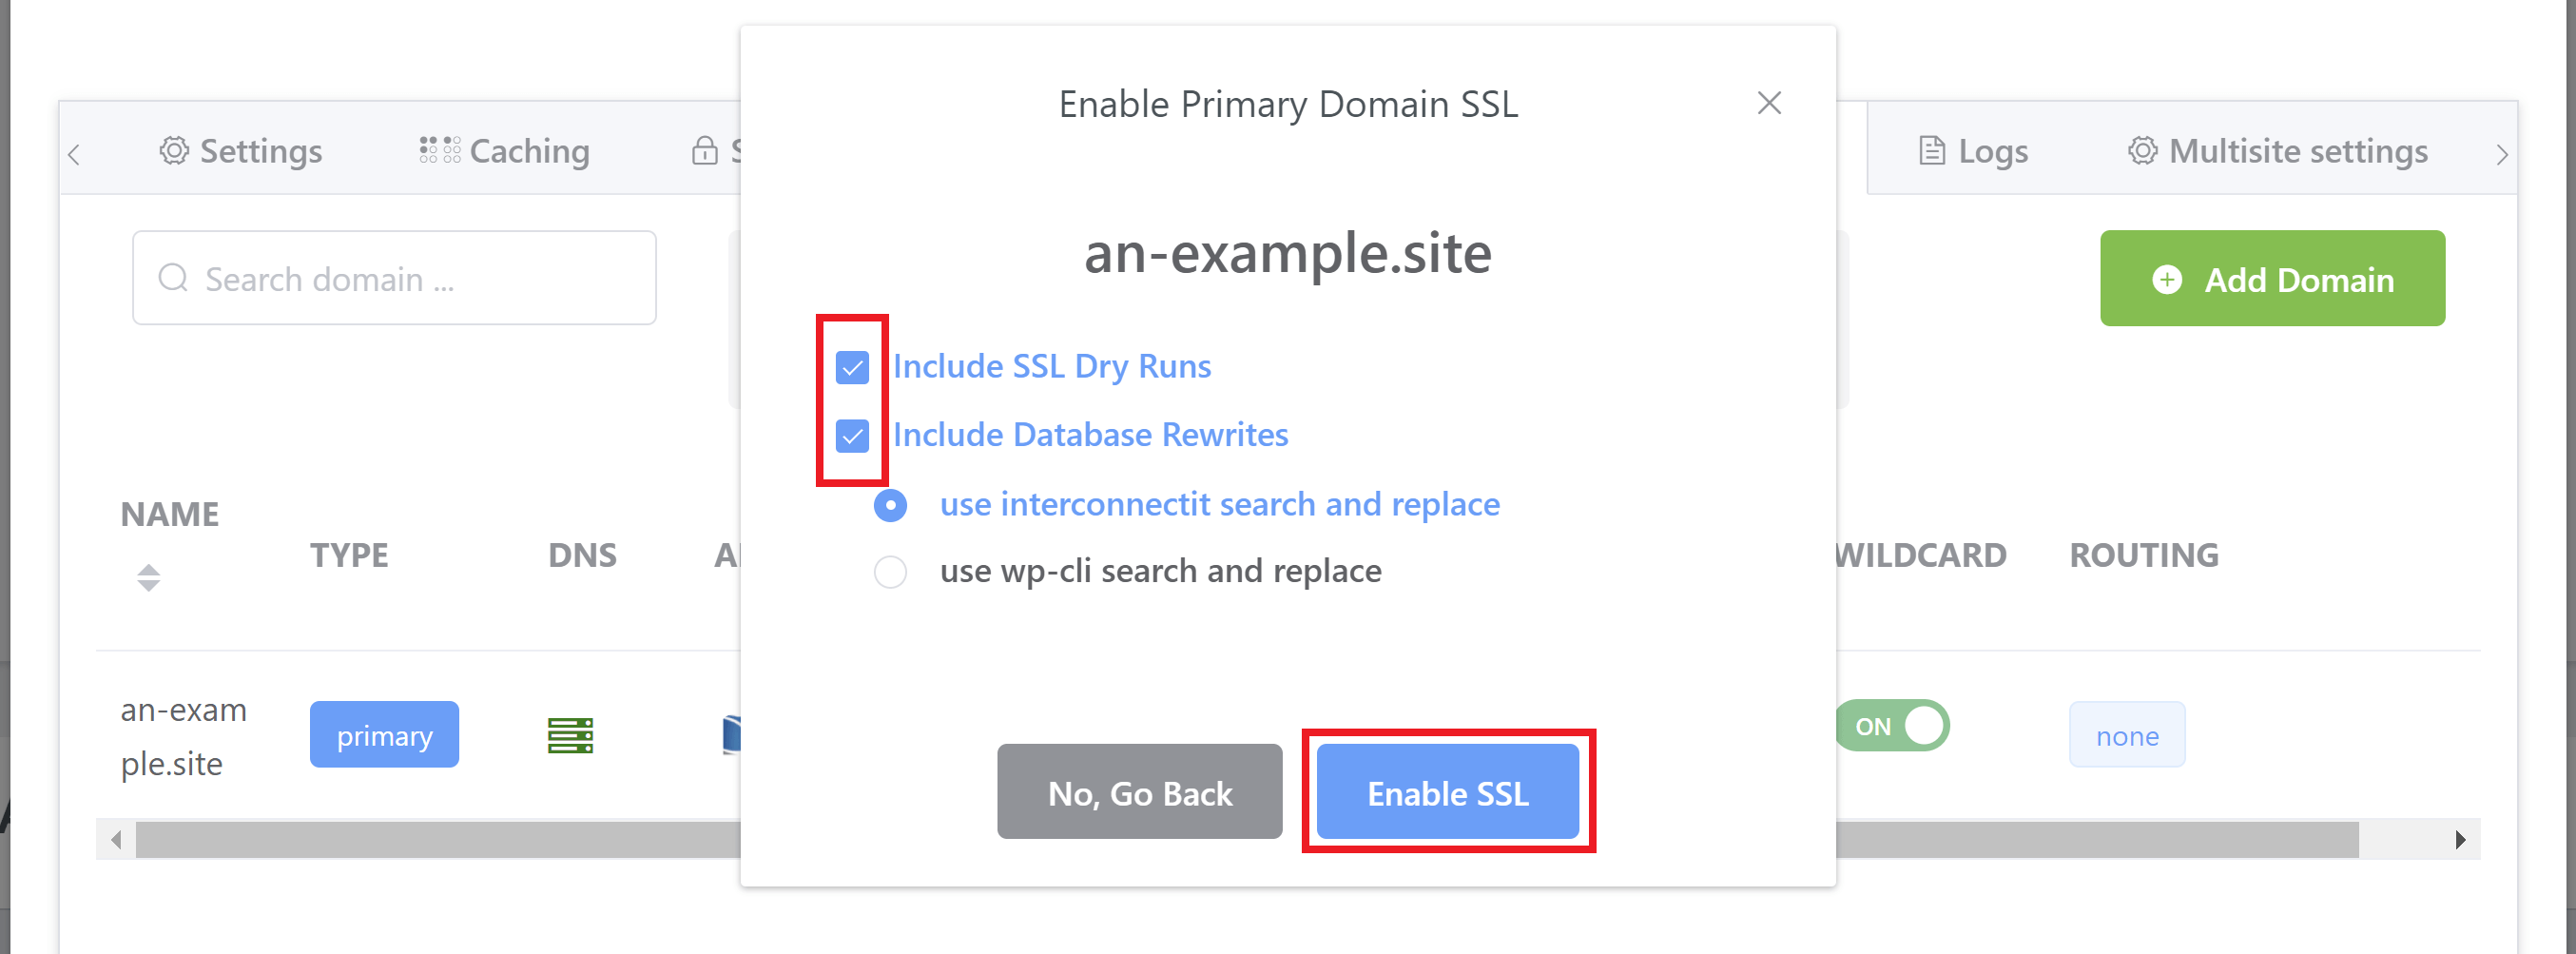
Generally, you’re going to want to run database rewrites. This will run a search and replace and ensure that all of your URLs are set correctly for your routing and HTTPS.
Two options are available to you:
- InterconnectIT
- WP-CLI
InterconnectIT is usually the best option as it’s more comprehensive. WP-CLI maybe a little quicker, but has a higher chance of missing some rewrites.
Make your selection and hit the Enable SSL button.
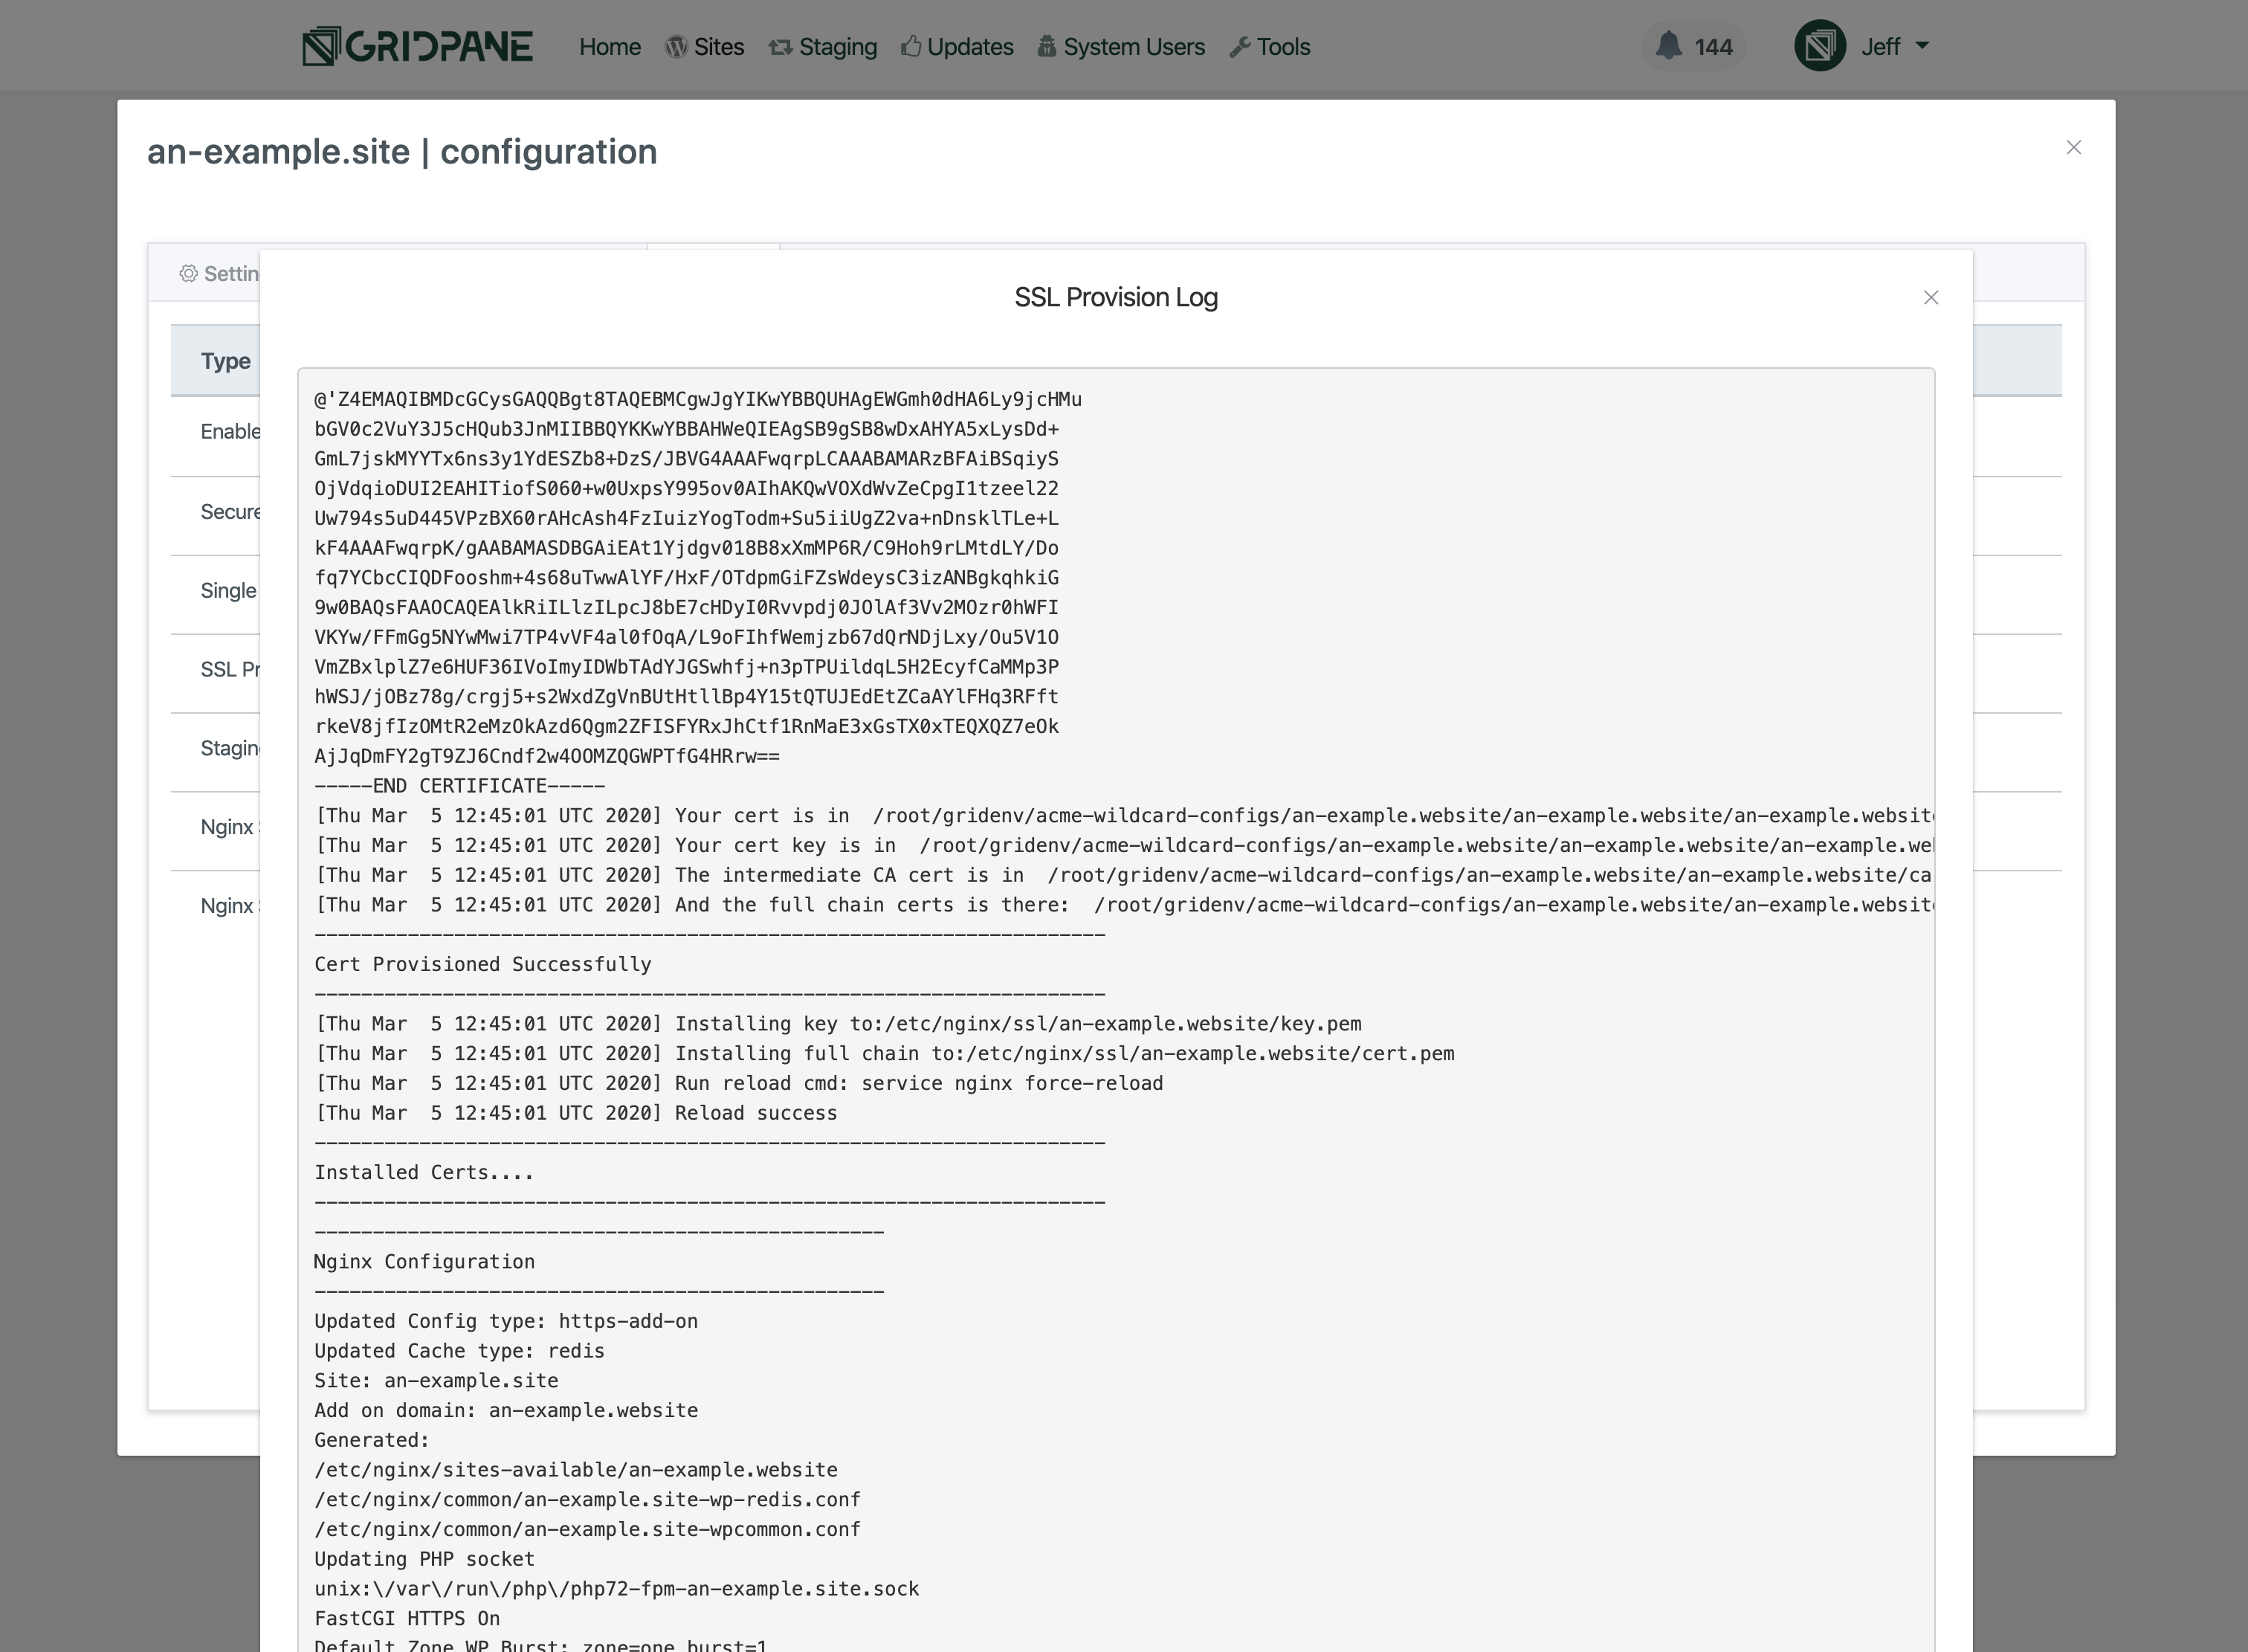
vCanopy will begin provisioning SSL for your site’s domain. You will see Notifications pop up in the top right corner of your browser as the SSL attempts progress.
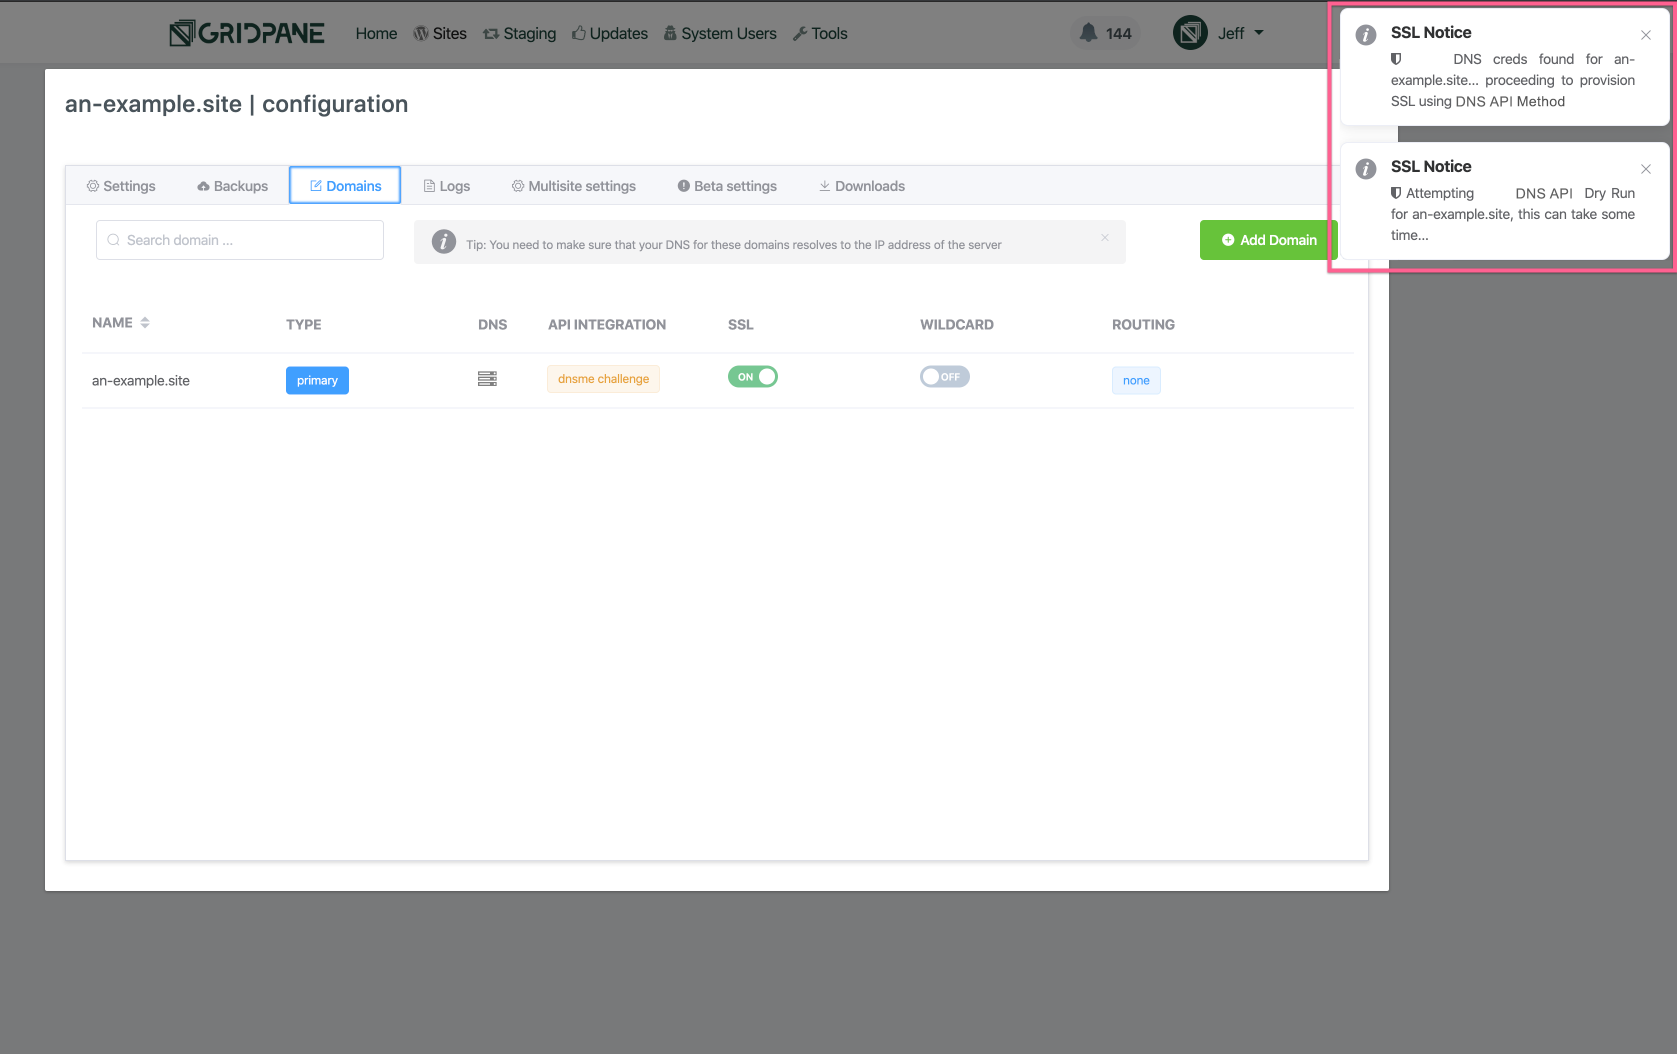
Enabling an SSL can take some time, especially when using any DNS API method. Expect the SSL attempt to take several minutes.
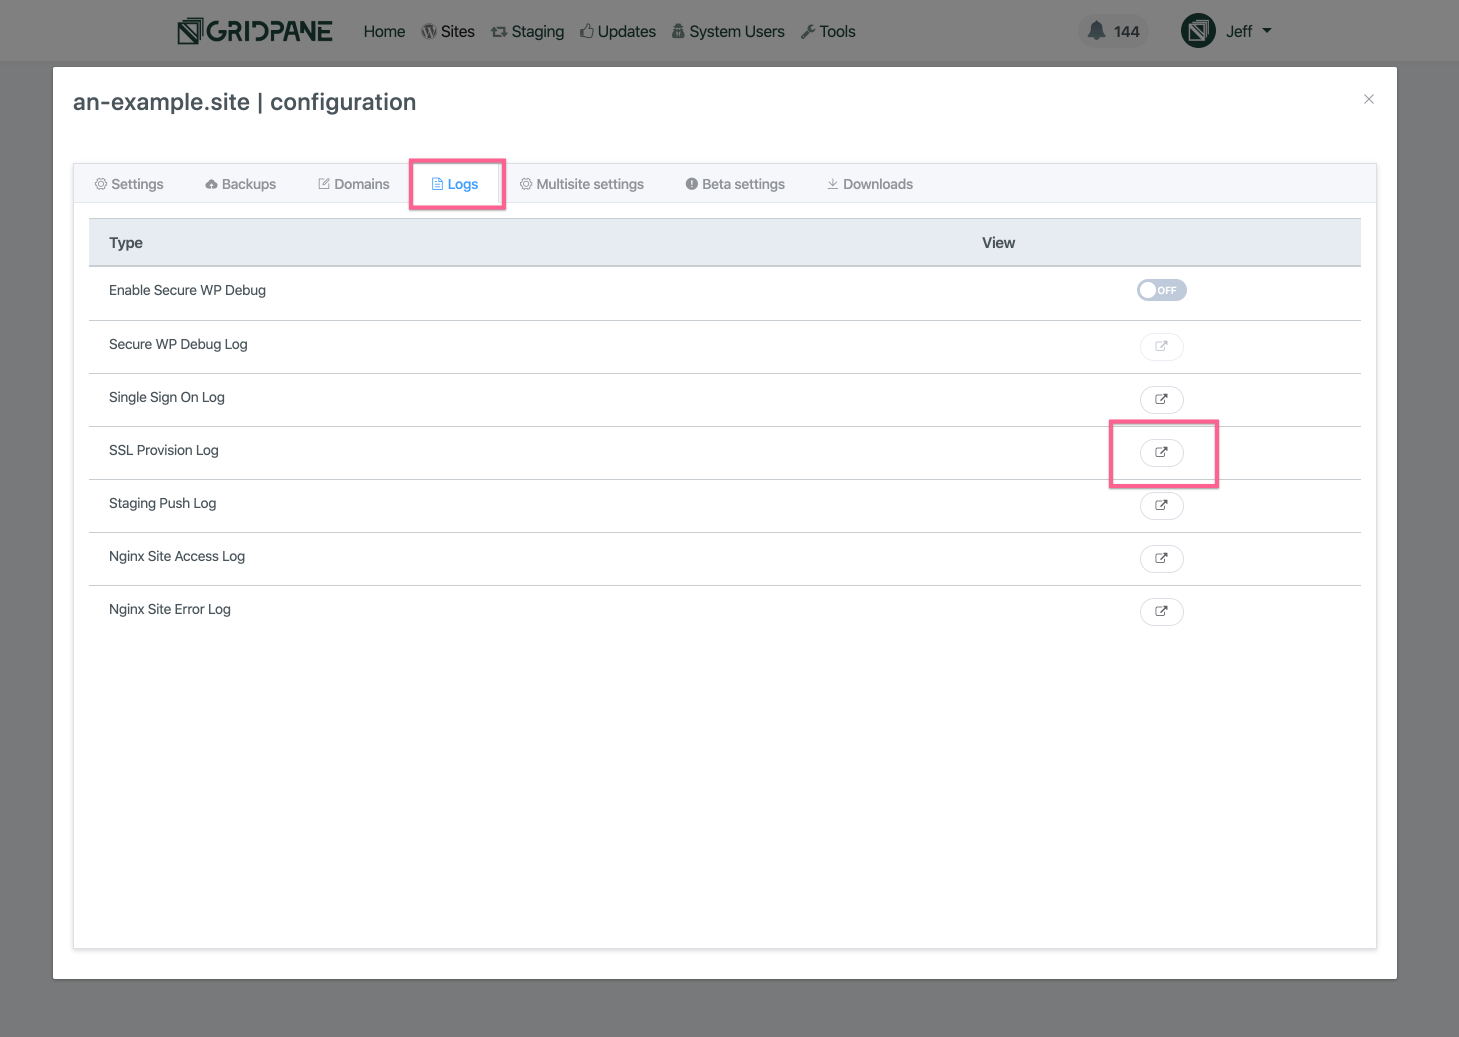
You can keep track of the notifications as they inform you about the progress of the SSL attempt. Alternatively, you can check the SSL provision log, available from the logs tab of the site customizer. The SSL provision attempt outputs every step of the process to the log.